13 Diy Fire Pit Ideas That'll Make Your Backyard The Talk Of The Neighborhood
As the only animals on the planet to have ever learned to make, use, and control fire, humans have an innate and evolutionary connection with it. In fact, over the course of hundreds of thousands of years, fire has helped to make us — well — human, contributing to the high-quality diet that, in turn, fueled our evolutionary increase in brain size. In other words, while fire is often much-maligned and should certainly be treated with caution, it's difficult to deny the primal way in which it can draw and hold our attention.
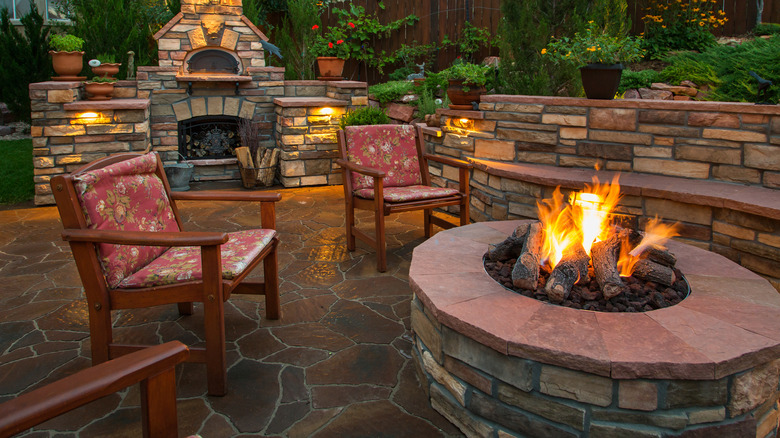
In the modern world, where fire is much less a requisite for our continued survival, its presence in our homes has become more akin to a luxury, its use extending well beyond the traditional hearths and stoves of our interiors. Having a fire outside can extend the hours during which you can enjoy your garden. It can provide an obvious gathering place for friends and family, warming those sitting around it, and even providing outdoor epicureans the chance to partake in a back-to-basics style of cooking.
Fortunately, you needn't spend a fortune to add a fire pit to your yard, provided you have access to appropriate fire-safe materials, and the tools and inclination to take on some home DIY. And since you're making it yourself, you have the opportunity to customize both it and the surrounding area to suit you and the way you plan to use it.
Turn an old washer drum into a fire pit
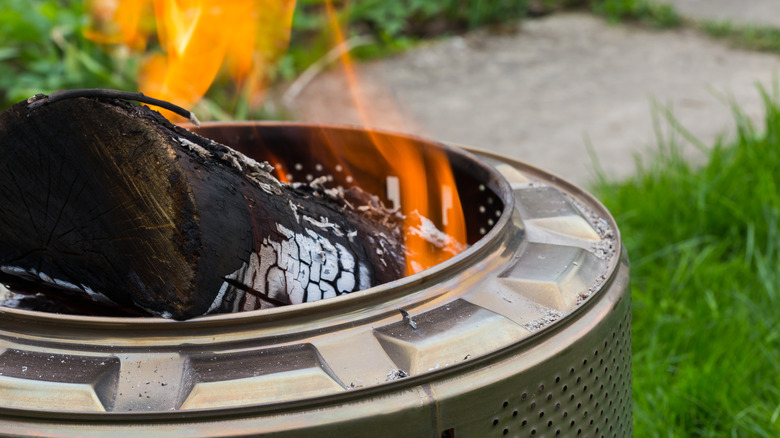
While it's not recommended that you pull apart a perfectly good washing machine to make this fire pit, if you find yourself with a broken appliance — or have friends who are throwing one away — then the drum can be put to great use as a ready-made garden fireplace.
You'll first need to remove the drum from the machine. Once it's out, check it over for any plastic or rubber parts, as these are sure to melt and emit toxic fumes if allowed to burn. Once those steps are taken care of, you're good to go.
As for where to put it, some washing machine drums have a spindle fused to the back of them. If that's the case, then your new fire pit might prove awkward on anything other than soft ground. You could remove the spindle if you have the correct tools, which would make the drum easier to place on flat, paved surfaces. Alternatively, you could use the spindle to your advantage, effectively staking the fire pit into the ground. Just know that the drum can get extremely hot, so it may be worth setting it on stones or pavers that extend beyond the fire pit a foot or two. In turn, this can help turn your fire pit area into something that feels more permanent, which is a good idea if you're placing it on grass, as the blades beneath are unlikely to survive a roaring hot fire burning on top of them.
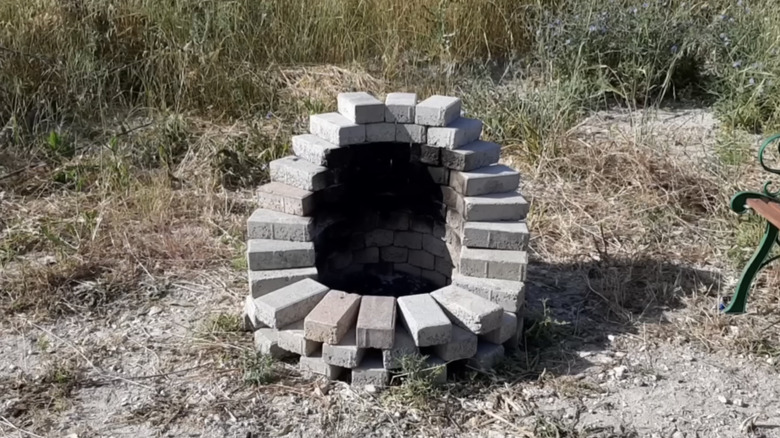
Build a simple fire pit with surplus pavers
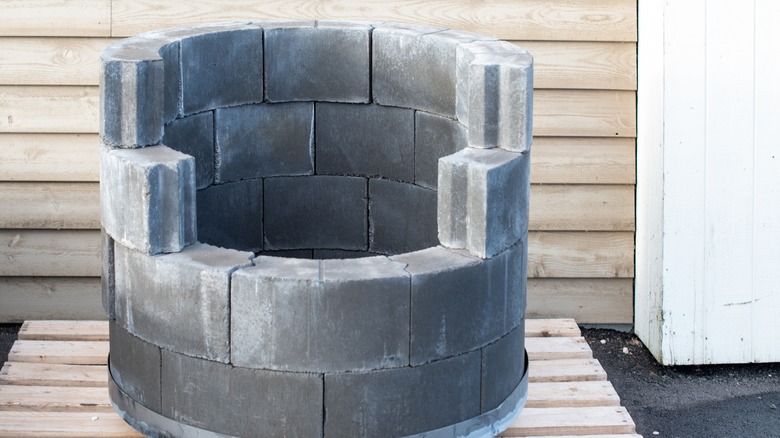
If you have a surplus of modular retaining wall blocks, or angled pavers, these are the perfect material with which to build a budget-friendly fire pit. Done right, this DIY project has the potential for a professional finish, something from which you'll take deep satisfaction each and every time you light the fire.
First, find or create a flat space about 12 feet in diameter. Then mark out your fire pit circle using a stake and string. Attach one end of the string to the stake and the other to a spray can, then spray in a circle around the stake until you have the area completely marked. Next, dig down, working your way in from the marked circle, until you have a round, flat-bottomed hole about 1 ½ feet deep.
Line the floor with gravel, tamp it down, add a layer of sand, and tamp once more until the floor is level. Mark out another, smaller circle inside the pit. You want the inner circle to be the width of your base pavers away from the pit wall. This will be your burning area. Begin slotting pavers around the edge. Tamp the pavers into the sand with a mallet, ensuring they're nice and level, before building up with consecutive, staggered layers, using concrete adhesive to hold everything together. The ultimate height is up to you, but ensuring that the wall protrudes from the pit by the height of at least three pavers will help to keep your future fires contained.
Make room for guests with a curved fire pit bench

While benches are easily ordered online or from your nearest home and garden store, it's unlikely you'll find the perfect bench to match your custom homemade fire pit (or it will cost a bundle). Instead, consider building a curved bench yourself, tailoring it to the size of your pit and ensuring your guests have plenty of room to sit and enjoy the flames. Just make sure that you test your measurements before you start building. It might help to imagine you and your friends roasting marshmallows; would you be able to easily reach over the fire with your skewer without standing up? If not, then neither will your guests, so adjust the proposed size and shape until you have a spec that works.
As for the materials you build from, it's up to you. There are plenty of unique outdoor seating ideas to spruce up your space you could use for inspiration. Whichever you decide to go with, the key is to ensure your seating follows the curvature of your fire pit. The bonus of doing so in smaller gardens is that you can easily fit the entire ensemble into a cozy corner, turning an otherwise unused space into a functional area for socializing after dark.
Repurpose an old pond
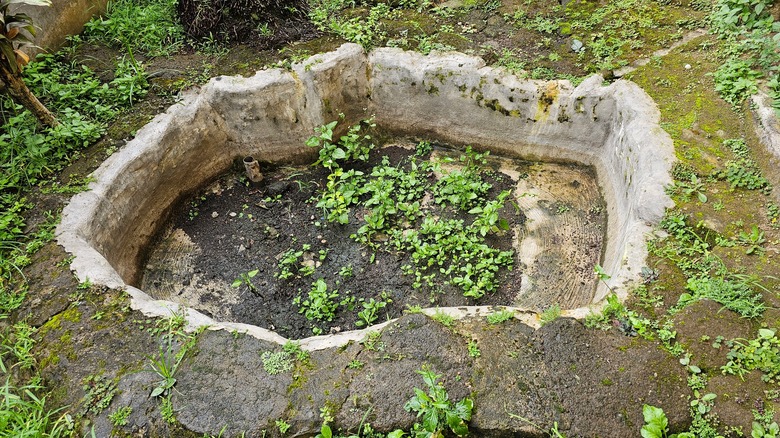
Whether you had to drain it because it was attracting mosquitoes, or simply decided it required too much maintenance, an old pond is an obvious place to light a fire, don't you think? This is especially true if your pond was lined with fire-proof rocks or concrete. However, if it wasn't, it doesn't require much effort to add them. If you're unsure whether the bottom of your pond is fire-safe, or it pond was dug by a previous owner, then be sure to double-check the pond liner. If it's lined with rubber or PVC, these flammable materials will need to be removed before you light a fire. Then simply line the pond with rocks, pavers, or bricks.
Also be mindful of the pond's surroundings. If it's tucked away in a corner of your garden and surrounded by trees, it may be unsuitable for two reasons. The first is that, with lots of surrounding cover, smoke will struggle to ventilate away from the area, rendering it unpleasant for you and your guests. The second is that nearby trees and any dead leaf matter lying on the ground beneath them are an obvious fire hazard as well as potential homes for critters who may not appreciate the smoke or heat.
Build a square fire pit with bricks
With rectangular clay bricks, it's easy — like, really easy — to build yourself a square fire pit. You'll need to mark your area out with stakes and string, then dig the area out a few inches or a couple of feet. As with the pavers above, you can tamp down a layer of gravel and sand. From there, it's a simple case of laying out your blocks in a staggered, square pattern, following the boundaries of your freshly excavated area. You can use cement adhesive or mortar, or if there aren't kids and pets running around, simply stack them, as long as the pit isn't too high.
To ensure that your bricks are able to cope with extreme temperature fluctuations, consider making a DIY fire-proof base for your fire pit. With the regular pit, gravel and sand at the bottom can absorbing much of the heat, but excessive heat can still damage your brick walls. By fashioning a heat shield out of steel to line the inside of your pit walls, or by doing the same with fire-proof bricks, you can ensure that the beautiful bricks on the outside maintain their visual charm for longer, without getting charred or cracked.
How high you build the walls of your fire pit depends on how you plan to use it. If you want the edges to double as seating, then build the walls at least 18 inches high. Any shorter, and outdoor relaxation becomes a risky business. If you simply want to put your feet up, then the walls should rise to between 12 and 14 inches. In any case, don't build too high: Any taller than 20 inches and it becomes difficult to enjoy the flames.
Construct a fire tower from old tire rims

If you're an avid upcycler and can't stand to see things go to waste, no matter how seemingly useless they are, this DIY fire pit idea is for you. Even if you don't have tire rims taking up space in your back yard, your local junkyard is likely to have a few kicking around that you'll be able to pick up for a small fee. Just aim to source truck or tractor tire rims — these are much wider than those of regular cars, and while you can use the latter, you'll find that your finished pit is quite small if you do.
Depending on how big you want your fire tower to be, you may want to weld a couple of rims together to create a kind of wood stove. Use an angle grinder or something similar in order to cut an opening through which to add fuel. Add a circular grill to the top and you've got an instant outdoor heat source and grilling station. But a single large rim works just fine as it is for fire. Just remember to pay attention to the surroundings and the ground underneath to avoid accidents.
Make use of an old wheelbarrow

Wheelbarrows are an essential tool for gardeners of any skill level, as you know. But did you know they can also be used to create an instant, and easy-to-move fire pit? The benefit of having a fire on wheels (not that you should move it while alight) is that you can enjoy it wherever you fancy, rather than restricting yourself to a single, dedicated zone.
Of course, you might want to avoid lighting a fire in a brand-new barrow. However, if you have one that's past its prime or no longer in use, this is a great way to save it from the junkyard. Just be sure that it hasn't degraded too much in the bottom or rusted too severely. You should also check the barrow over for any plastic or rubber parts: These are flammable and toxic when burned. This trick isn't recommended for use where kids and pets are active, as a wheelbarrow can easily tip if jostled.
Another benefit of using a wheelbarrow is that it's incredibly easy to store when not in use, and only takes up space on your patio when you actually want to use it. And whether you plan to use ash to repel pests, adjust the pH of the soil around your fruit trees with wood ash, or add it to your compost heap, all you have to do is wheel your barrow to your chosen spot and start spreading.
Form tree edging rings into a fire pit

For this trick, head to your local home and garden store and pick yourself up some tree surrounds or rings. These structures, made of metal or concrete, are designed to mark a designated area for trees to grow, and you'll often see them on their own or in sidewalks, filled with gravel and other decorative mulch materials, with a tree rising from their center. They can also make a fantastic, low-cost fire pit. As with other options above, clear a space, dig a shallow pit and level it, and insert your ring or rings. You can line the base of the pit with rocks or bricks if you wish.
You could buy a metal ring to mark the outer edge of your pit. Alternatively, if you can find concrete tree-ring sections in different sizes, you could form two rings — an outer wall, and a smaller, inner circle for mounting a grill or firebowl. A Weber-style grill with the legs removed is ideal here. Not only are they designed for burning combustibles with optimal air flow, but they can be easily shut down by covering your fire with the lid and closing the vents. If you're making a pit with concentric rings, fill the interior with cobbles for additional heat retention, insulation, and heat focus.
Build an asymmetrical fire pit with bricks or pavers
Being able to enjoy a fire in your own backyard is almost certainly the primary reason for building a fire pit. But that's not to say that the structure shouldn't also show off your flair for DIY and design, and for that reason, this idea is perfect. There's no specific design here — the idea is to get creative with the size and shape of your fire pit.
One idea for an asymmetrical, circular design is to build a high back, with rounded walls that descend around the border lines of your pit until they meet at a low point on the opposite side. You could also build an L-shaped fire pit from bricks, complementing similar-shaped garden furniture and ensuring that everybody sitting on it stays nice and toasty. With an L-shaped fire, you could also designate the smaller "L" section as a no-burning zone (more on this later), which, since it'll still be warm when the fire is lit, can be used for keeping cooked food warm.
Save on space with a semi-circle fire pit

One of the only downsides to adding a fire pit to your patio is that they can be greedy when it comes to space. But they don't need to be. In fact, by constructing a semi-circle-shaped pit from bricks or pavers and butting it up against the boundaries of your deck, patio, or yard, you can create a dedicated space in which to light a fire, without dominating a small outdoor space when it's not in use. And you'll still have room to create privacy in a small yard with a dwarf podocarpus.
Depending on the kind of wall or boundary you set the pit against, you should be mindful of how big your future fires are likely to be. Built against a low-lying flower bed borders may damage to your beautiful blooms. You can try adding stones or metal flashing to protect wood or plants. However, if you have a taller wall available, you can build a semi-circle fire pit to match, allowing you to burn larger fires without the risk.
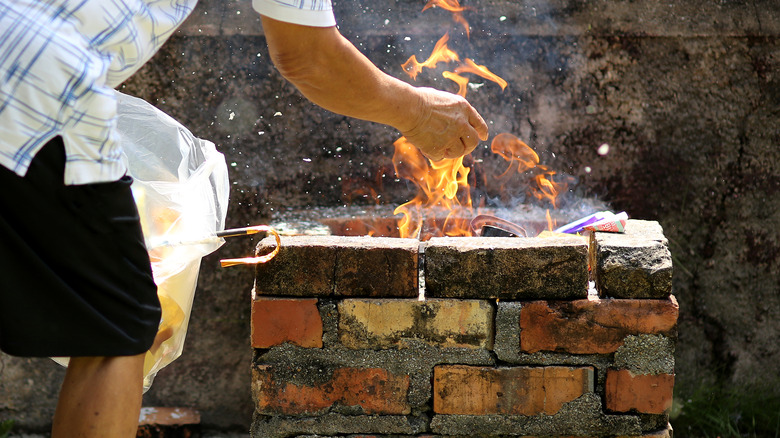
Put your garden incinerator to more use

If you already have a garden incinerator or burn barrel (and live where their use is allowed), then why go to the trouble of building a fire pit? If you only plan on lighting a refuse fire once or twice a year, then a permanent fire pit taking up extra space on your patio doesn't make much sense.
Instead, dust off your incinerator, lay some pavers for it to stand on, and light it up. Now, it's worth mentioning that, while garden incinerators are designed for burning leaves, branches, and waste pulled from around your garden, it's a bad idea to burn weeds when using it as a fire pit. And garden waste in general — especially that which hasn't fully dried out or seasoned — is almost guaranteed to smoke profusely once set alight, which is sure to spoil your fun. However, provided that you burn appropriate fuel, like well-seasoned firewood, and you don't overload your incinerator, it'll produce no more smoke than any other fire pit.
Make your fire pit functional for cooking
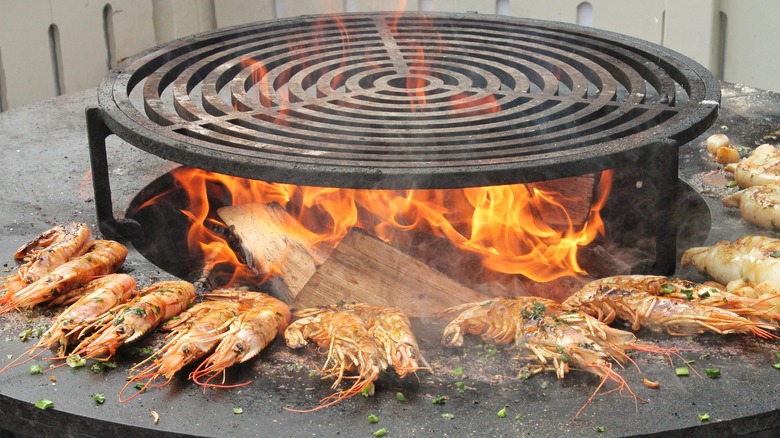
Whatever style of fire pit you decide on, paying attention to how you'll use it — beyond the obvious burning of wood — can help turn it into a functional centerpiece you'll use throughout the season. Perhaps the most obvious way to get more use out of your fire is by cooking over it. Of course, this isn't always easy, especially if your pit isn't designed to accommodate cooking grates or spits. But with a few tweaks at the design stage, it can be super simple to adapt.
One idea is to ensure that a cooking grate can be easily and securely mounted over your fire pit, making it ideal for grilling burgers and other cookout staples. Another is to do the same, but over a dedicated no-fire zone part of the pit. With only indirect heat from the adjacent fire, a no-burning zone is the perfect resting spot for pots and pans, keeping food warm while you wait for the rest of the meal to finish cooking. This could be as simple as adding a set of pavers adjacent to the fire, or attaching a grate or other platform to the side of the pit.
Finally, if you're building a fire pit with the hopes of regularly cooking over it, ensure that it's tall enough for both you and the food. To prevent overcooking and burning your food, you need to ensure there's enough clearance between the flames and the grate. Meanwhile, setting the grate high enough you can either successfully kneel or stand while cooking will save your back. If you like to use a cooking tripod, make sure that the legs will clear the pit, or the tripod fits inside the pit.