

Say Goodbye To Traditional Lanterns: Transform An Old Pickle Jar With Crayons

We may receive a commission on purchases made from links.
DIY projects, upcycling, and outdoor living spaces are trends that are on the rise across the United States. At times, these three interests can intersect. Such is the case with utilizing old pickle jars to create outdoor lanterns. While this can be done in a variety of ways, one hack that will make your outdoor space look luxurious on a budget is using crayons to transform your old pickle jar into a crackled glass lantern. The trick works because crayon wax, strategically applied, adds depth and texture that resembles crackled glass when covered with alternating layers of sealant.
Pickle jars are handy for a number of DIY outdoor projects, such as making an emergency camping lantern or a simple birdbath and waterer. And they're ideal for this DIY because they are common, cost-effective, and you likely already have them on hand. They are also made from clear, thick glass, making them durable enough for outdoor use with votive candles, and come in a variety of sizes.
This DIY project is easy, but does require a few items, some of which you may need to pick up if you're not an active crafter. For starters, you'll need empty pickle jars and crayons. You'll also need some water-based polycrylic sealer, such as Minwax clear gloss polycrylic protective finish and a spray can of clear engine enamel, like Dupli-Color engine paint with ceramic. Other necessary supplies include fine or extra-fine glitter, a small bowl, an artist paint brush, and rubber or latex gloves.
Customize your crackled glass lanterns
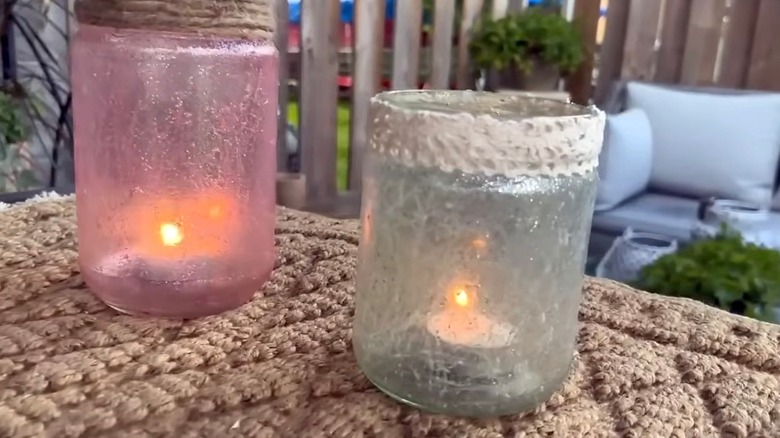
There are a number of ways you can approach this DIY to achieve variations on the desired effect. Essentially, you are alternating crayon markings on the outside of your pickle jar with layers of sealer mixed with very fine glitter to enhance the crackle effect. White crayons and clear sealers work well, but you can try different colored crayons or mix in a bit of paint or food coloring to the sealer. The first step, regardless, is to thoroughly clean the pickle jars. For best results, make long, haphazard, and criss-crossing lines with your crayon and allow the sealer to dry thoroughly between steps. Two or three layers of crayon and sealer should do the trick.
After completely covering the jar with polycrylic for a second time, dab the paintbrush over the surface to give a roughened, stippled look. This helps diffract candle light and adds even more texture. At this point you can decide you're done, or add another layer of crayon and sealer. When the final coat of polycrylic is dry, spray the jar with engine enamel. This should be done outside while wearing gloves.
Your lantern is essentially done when everything dries. At that point, pop a votive, tea light, or LED candle inside. Filling the jar with fairy lights will provide a complex, charming illumination through the crackles. Should you wish to customize the lantern even more, consider wrapping twine or a ribbon around the mouth, covering the threads. You can also hot glue twine, wooden skewers, colorful strips of cloth, or beads around the outside of the jar for added character and depth.