

Say Goodbye To Traditional Birdbaths: Use An Old Pickle Jar For An Easy DIY Solution
We may receive a commission on purchases made from links.
Adding a birdbath or two is a simple way to get birds to your yard or garden — giving them a space to wash, preen, and cool themselves. But if your own space is at a premium or you're on a tight budget, then choosing the right birdbath size and style becomes a lot more challenging. That's when it's time to get creative with a DIY solution. One option is to take advantage of vacuum pressure and surface tension by creating a compact, automatically refilling birdbath out of a pickle jar and a pie tin or plant saucer. Not only is this a DIY you can complete in minutes — if you have the supplies — it can cost almost nothing and repurposes items that might otherwise be destined for recycling or the landfill.
For this simple birdbath and waterer, all you need is a clean pickle jar (a Mason jar also works), some sort of shallow dish or saucer with deep enough sides to retain water, a little hot glue, an awl punch or nail, and a hammer. You can add a few decorative pebbles or shells for footholds, and create a twine or wire hanger to suspend the entire thing from a branch, if you want to get a little fancy. The beauty of this bath is that, as water is splashed out or consumed, the dish refills automatically for a day or two until it's time to clean and refill the jar. While there are store-bought versions of this compact birdbath, like the Perky Pet mason jar wild bird waterer, you'll save about $30 making it yourself, which is half the fun.
Two or three holes in the lid is the key to this DIY birdbath
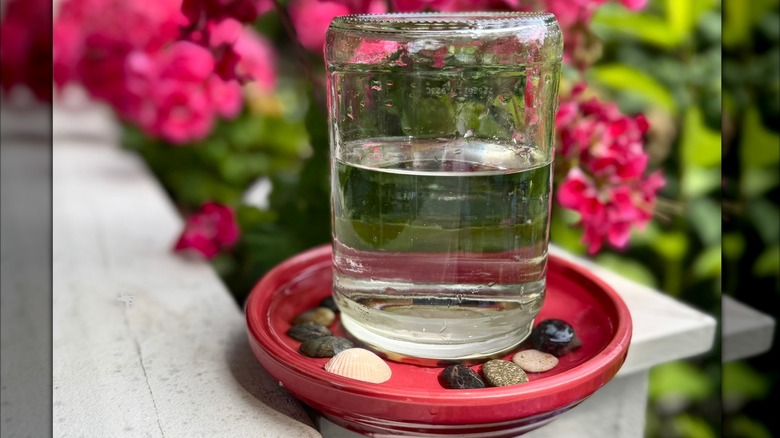
The first step is to completely clean your pickle jar: Birds don't really need pickle brine in their drinking water, after all. You don't have to remove the label, but it looks nice. Set the lid on a steady wood surface and punch three holes through it with the awl or nail. Create spacers on your pie plate or plant saucer with a few small beads of hot glue, let them harden, then glue the lid to those spacers. All you need to do now is fill the jar about halfway, screw the lid back on, and invert the whole thing. Set it on a tree stump or sturdy porch railing, or suspend it from a tree. Within a few days, birds (and bees) should get brave enough to try it out.
The reason this DIY is so clever is thanks to physics. By placing the hole-punched lid low in the dish, but with enough room for a little water to flow out, you take advantage of two properties. Once water rises just above the seal of the lid, a mild vacuum is created inside the jar, while air pushes against the water in the dish, creating differential pressures and preventing your little bath from overflowing. The particularly strong surface tension of water helps out here as well. When enough water is removed by bathing birds, a little more flows out of the jar and the whole process starts over.
To keep your new project at peak performance, it's important to change out birdbath water every couple of days. The jar can get slimy quickly and the tray fills with feathers, bugs, and waste, creating a health risk for the birds.