Illuminate Your Outdoor Space For The Holidays With A DIY Ice Lantern Idea
We may receive a commission on purchases made from links.
As the holiday season approaches, you may be looking for ways to add some holiday spirit to your front porch or lawn. One innovative way to do this is to illuminate your outdoor space for the holidays with a DIY ice lantern. These frozen decorations have traditionally be used by Scandinavian cultures to celebrate the winter solstice — the shortest day of the year and the beginning of astronomical winter. However, given the broad number of ways in which they can be customized, they are perfect for use throughout the holiday season.
Although ice lanterns are sometimes called ice candles, the former moniker is more accurate, as ice is used as a transparent vessel in which the actual candles are placed. There are many ways to create them, and they can be made in virtually any size, decorated how you please. None of these methods is very difficult and all require on a few basic items. Each method also lends itself to fun customization. The only caveat is there has to be very cold temperatures in the weather forecast in order to make the ice lanterns form then use properly.
One popular option is to make an ice lantern using a bucket and setting it outside to freeze. The first thing you need, obviously, is a bucket. You can use any size, It really just depends on what size ice lantern you are hoping to create. A 1-gallon American Metalcraft galvanized bucket works well for medium-sized lanterns, or step up to a 5-gallon bucket when decorating larger areas. Use a cup or butter tub for more intimate spaces like porches or steps. Otherwise all you need is water and, if you choose, decorative materials like pine shoots or flowers.
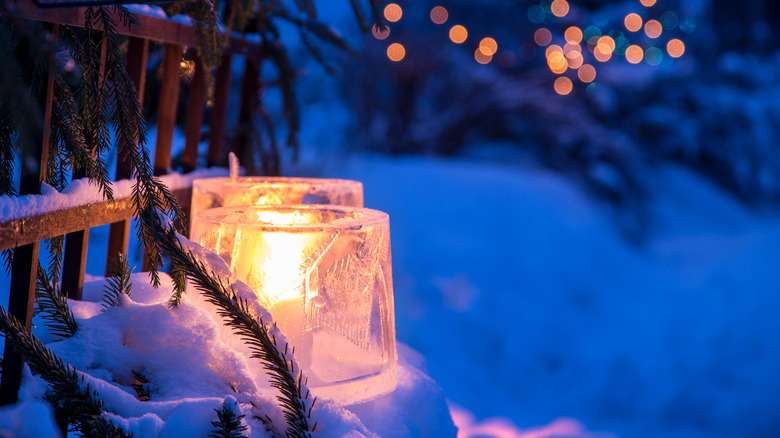
Various ways to DIY an ice candle using a bucket

The simplest method for creating an ice lantern is to simply fill the bucket with water and freeze it overnight. Should you wish to color the water or add decorations, now is the time. If freezing winter weather is on the way, you can just leave the bucket outside. Otherwise place the bucket in a chest freezer until it is ready. You can complete this method in a couple different ways.
The "fastest" way is to wait until the water has frozen an inch or two thick on top, but before the entire thing is a solid block. This basically entails checking the bucket after 12 to 24 hours. If there are still bubbles moving around or water sloshing when you shake the bucket, you're good. Once sufficiently frozen, flip the bucket over and bang on it a little or pour warm water on the outside of the bucket to release the ice. Make a hole in the thin layer of ice that was at the bottom of the bucket, and pour out the water within. Insert your candle (battery operated will last longer), and you're all set.
A second method is to let the entire bucket of water freeze solid. You can also do this if you misjudged while attempting the first method. Once you've got a solid block of ice, repeat the steps to remove it from the bucket. Place a metal can or small pot in the center of the frozen block. Pour boiling water into the can, allowing it to melt an indention into the block. Dump the cooled water and repeat until the indention is the desired depth. Then, light a candle and place it inside.