

Man DIYs An Impressive Backyard Bridge With Concrete Blocks And Wood
We may receive a commission on purchases made from links.
If you had a small creek or river that split your property in half, you'd want to build a bridge over it, wouldn't you? Thankfully, you don't need to be a candidate for "Homestead Rescue" to make this dream a reality. All you need, really, are some concrete blocks, wood, and a dedicated weekend and you can build a simple, but impressive, DIY bridge on your property.
This idea comes to us courtesy of Matthew Buchheit of the thebuchaus Instagram page. In a recently posted reel, Buchheit explained that a small creek blocks him off from one side of his property and how, because of this, he's left the area unused. Finally deciding to explore it, Buchheit crossed the creek with some makeshift scaffolding and cleared away the overgrowth so he could create some shallow footings on either side of the creek.
A follow-up reel posted the next week showed how Buchheit completed the bridge using lumber and finished everything with a protective wood stain and some quick landscaping. While it's certainly not one of the highest bridges you'll ever hike across, it serves the purpose of opening up a side of the property Buchheit was underutilizing. If you have a property that's in need of this DIY, building a bridge can help you transform an unused part of your yard into useful space.
How to build a DIY cross-creek bridge
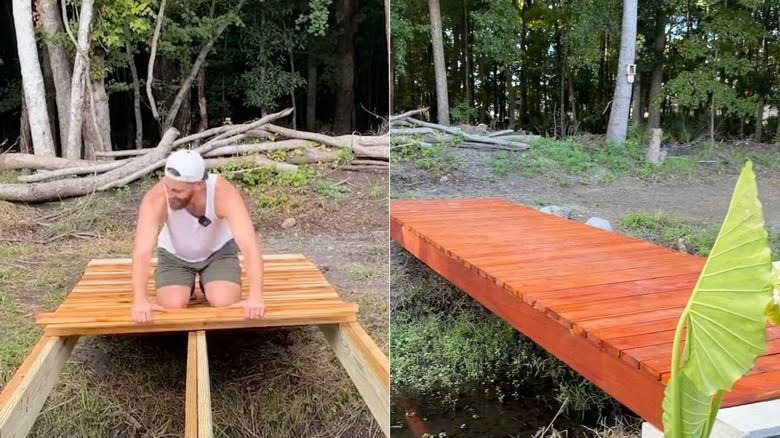
While Buchheit doesn't provide a materials list for his build, we can put together a step-by-step plan on how the bridge was built based on the aforementioned reels. Buchheit constructs what's known as a beam bridge, an ancient building technique where horizontal beams are supported by piers on either end. The short length of Buchheit's project is ideal for a beam bridge, which loses strength the farther it spans.
To make the opposing piers, use a shovel to dig shallow footings into the ground. Level the ground with a hand tamper, fill each footing with gravel, and level again with the tamper. The piers themselves are made of standard 8-by-8-by-16 inch concrete blocks, measuring three blocks deep and four wide. An additional four blocks are spread the length of the pad and glued in place using a strong adhesive like Loctite PL Premium. This creates a step on which the wooden bridge frame can butt up against. You'll need a total of 32 concrete blocks to replicate these footings.
The body of the bridge is made with a wooden frame of what looks like 2-by-6 inch beams. The length of the lumber is not specified, but it's likely between 8 and 16 feet. The frame sits snugly between the pier steps. Finish the bridge by securing wooden decking boards into the frame using screws. For a final touch, Buchheit then applied timber oil (the color he used was Cabot's Mahogany Flame) to protect the wood.
How a bridge can transform your yard
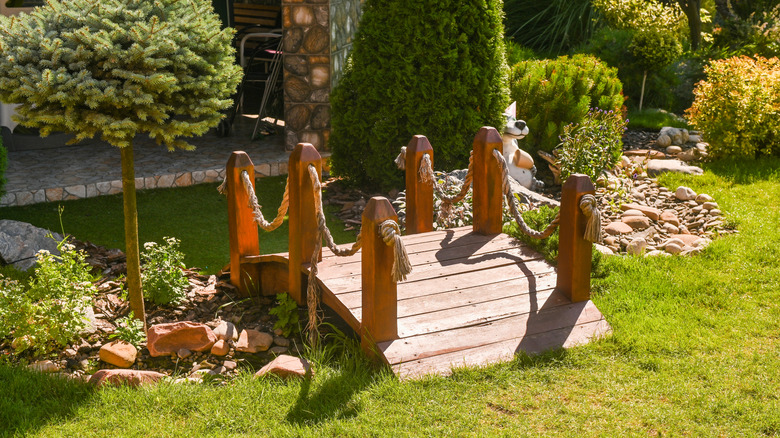
Aside from serving the practical purpose of crossing a body of water, there are a lot that bridges can do for your property. Even if you don't have a small creek that you need to cross, a bridge like this can be used to create a walkway over a small decorative pond, or to span a dry drainage ditch or length of uneven terrain. You can even use this building method to construct an innovative, elevated boardwalk through your garden if you so choose. The ideas really are endless.
Also, as far as construction materials are concerned, you needn't follow Buchheit if you don't have the budget or a means of getting the materials. While the wood, gravel, and concrete blocks are not exceptionally expensive, you might be able to pull off a version of this DIY by making use of extra bricks or wood you have lying around from a previous project. Wooden pallets could even be used for the body of this structure, provided they are intact and not rotting — or you could take them apart and use the planks as the upper slats to save on costs.