Stay Warm While Car Camping With A Simple And Affordable DIY Trick
We may receive a commission on purchases made from links.
Car camping can be convenient. It can also be cold, particularly in the winter. That's because unlike RVs and travel trailers or fifth wheels, vehicles are not well insulated against cold or heat (this may change in the future with electric vehicles). Cars are largely constructed from metal and glass, materials that are inefficient insulators. This means you quickly lose whatever heat had built up inside your vehicle once night falls, your engine is off, and the temperatures drop. Although heat dissipates through doors and other metal parts, it's the windows where heat is lost most quickly. So the key to staying warm is to slow this two-way flow of hot-and-cold by insulating your car windows, which can be done simply and affordably by making DIY window insulation panels.
While there are a variety of tricks to keeping warm while car camping, including cracking windows to reduce condensation, maintaining heat within the vehicle is essential. That's where insulating your windows comes in. Since, that is how heat escapes most rapidly from vehicles, it's the best way to make the biggest impact when it comes to staying warm. Placing insulation panels over the windows (on the inside) will help contain the heat in the vehicle and slow cold air from entering. Additionally, it is a good car camping safety measure, since it gives you a little more privacy while your sleep. Another benefit is that insulated window covers help prevent humidity condensation and frost buildup on your windows.
Simple steps to DIY window insulation panels for car camping
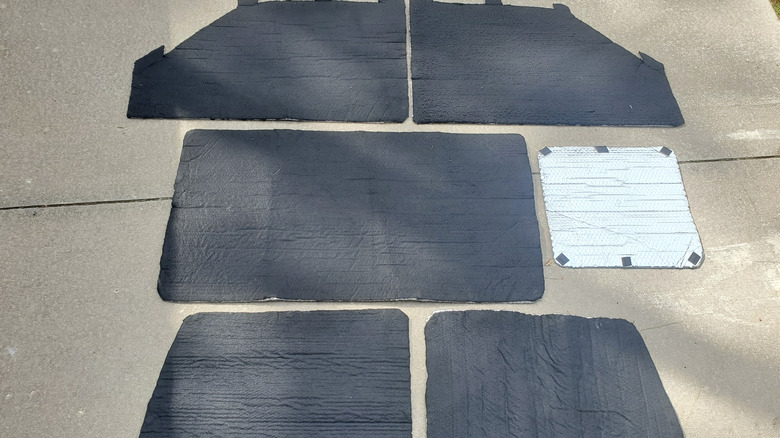
Creating effective, efficient window insulation panels is pretty simple. Although it can made from a variety of materials, most car campers and van life enthusiasts agree a roll of Reflectix bubble pack insulation, or a similar brand, is the best option for this purpose. This material has a shiny, reflective side, and a dark side. So, it can both reflect and absorb sun. During the winter months, placing the black side out and reflective side in will retain heat from within the vehicle while absorbing heat from the daytime sunlight.
To make your panels, trace the outline of each window in your vehicle onto butcher paper. Then, cut out that tracing to make a stencil which can then be traced onto your a piece of Reflectix or other insulating material. Cut the Reflectix slightly larger than your windows; when the panels are pushed into the window frame, the excess material holds them in place. It may take a bit of trimming and experimenting to find exactly what size fits just right. So, start with a larger cutout and shave a bit off at a time until you find the right size so that the panel holds in place flat against the glass. If you like, you can also customize them with holes cut out to fit small electric fans to allow airflow as needed.
A particularly nice feature with this sort of DIY insulation is portability. The panels are lightweight, and when folded, take up very little space, which is always at a premium when it comes to car camping. Additionally, those living in areas prone to heavy snow can pack them with their emergency supplies, in case they are ever stuck in their car and need to stay warm.