How To DIY Beautiful Garden Sculptures Using Old Bundt Pans
Your yard is your sanctuary — a private retreat tailored to your personal style. What better way to show off your artsy personality than with cute DIY garden decor? While you can purchase sculptures in a variety of styles at different price points, there's something special about making your own — especially when you're using old items around your home that would otherwise end up in the trash.
If you're an avid baker, cake pans are a must-have. However, you may find yourself with a pan that's no longer suitable for baking. Or perhaps you've stumbled across a thrift store filled with beautifully shaped pans and no idea what to do with them. However you acquire your pans, these DIY garden sculptures are a fun way to turn common household items into garden decor that sparks conversations.
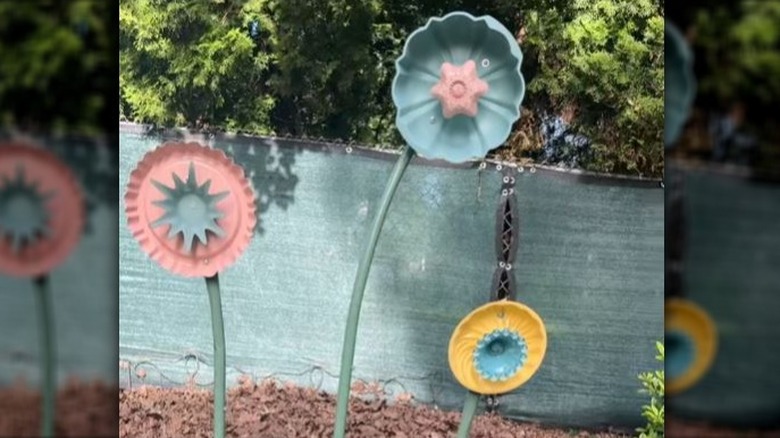
There's no limit to how creative you can get when making your own DIY garden sculptures from old cake pans. TikTok creator @mom.behind.the.scenes uses their pans to create beautiful flower artwork that adds a splash of color to their yard. To try a similar design, gather cake pans, metal or glass dishes, candle holders with unique shapes, outdoor-safe spray paint, and a strong, weather-resistant adhesive. You can use hooks and cordage to hang these around your yard or opt for using other materials you have lying around to create a 3D display.
Create eye-catching yard art with old cake pans
If your pans have been used in the past, you'll want to give them a deep clean before diving into this project. Spray paint sticks better to clean surfaces that are free of any dirt, grime, and oil. If you choose an all-surface spray paint, you may not need to prepare your pans any further. Always follow the manufacturer's instructions on your spray paint and practice proper safety, such as painting in a well-ventilated area.
After you've painted your pans, as well as any other dishes you've picked up for your DIY garden sculptures, you can start assembling your design. Practice assembling your sculpture before using adhesive. This way, if you end up not liking two pieces together or aren't happy with the final design, you can go back to the drawing board without needing to find new pans. Once you're happy with your design, you can use your outdoor adhesive to attach the pieces together.
@mom.behind.the.scenes Saving our sanity with one backyard project at a time. Anyone want to sponsor our quality time? @gorilla glue official ? @Makita Tools USA ? @Rust-Oleum ? You know you want to. #wishfulthinking #backyard #backyardprojects #diy #marriage #thrifted
♬ Fun guitar songs for Youtube, commercials, etc.(899019) – Lyrebirds music
The last step is to choose where to display your brand-new artwork. This step is personal and depends on the size and style of sculptures you created. For smaller sculptures, you can attach them to stakes and add them to your flower pots. For larger pieces, however, you may want a more flashy and eye-catching means of display, such as a custom stand or even a spot to hang them on your patio or deck. Once you've installed your new artwork, you can take your design a step further and opt for lighting that highlights your hard work. Just make sure to keep the top outdoor lighting tips to reduce light pollution in mind.