How To Easily Waterproof Your Wooden Planter Box

Wooden planter boxes are a popular place to grow flowers and vegetables that you may not want to put directly into the ground. Plus, they look great anywhere you want to place them, including front porches, back porches, decks, and directly in the garden. If you live in the city and don't have a lot of property for garden space, wooden planter boxes are the perfect solution. They come in various sizes, you can grow anything in them, and you can even add a simple DIY garden trellis to them that makes your planter box look modern and chic. There are many tips that will help your DIY wood planter box last longer, but the most important is waterproofing. Taking this precaution prevents the material from becoming damaged due to the moisture and outdoor elements.
If you are making your own planter boxes from scratch, make sure to choose wood that is resistant to water and moisture, like redwood, cedar, and teak. If you're using pine, make sure it is pressure-treated, which will help strengthen your completed boxes against the elements, along with waterproofing them. The needed steps are simple and easy, but make a huge difference in the longevity of your containers, so you don't have to keep replacing them. Any planter box made from wood can be waterproofed, like this unique old wine box that is transformed into an eye-catching outdoor planter. While it does take extra time, the results of taking this precaution are worth it!
Sealant and lining are the key to waterproofing your wood planter boxes
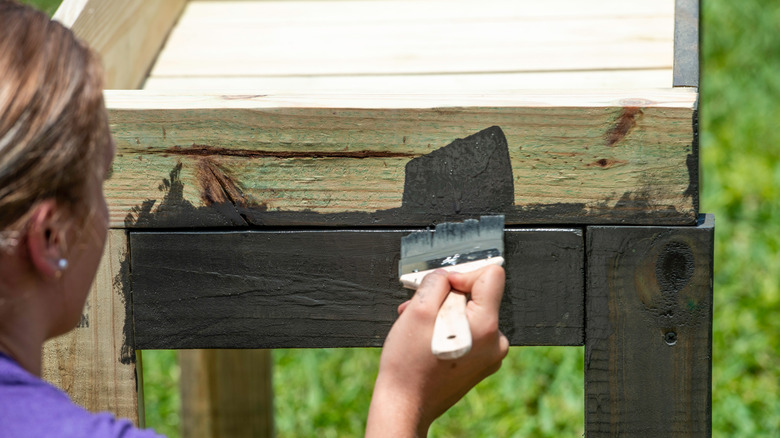
Once you build your boxes, it's time to waterproof them. Begin by sanding the surface of the wood planter to remove rough areas and give the sealing material a nice surface to adhere to. Next, apply a sealant to the inside and outside of your planter box. There are several types you can use for waterproofing: marine varnish, polyurethane sealant, and tung oil, which is a non-toxic choice. Whichever you choose, apply it to the box with a brush, covering all areas evenly so there are no thin spots. After putting on the first coat, let it dry thoroughly before applying a second, even layer. Then, let the planter dry for at least 24 hours before you move on to the next step.
Adding a liner inside the wooden container provides extra protection against water and can keep your planter boxes in great shape for a long time. There are several options to consider, including plastic liners, landscaping fabric, and pond liner, which is the thickest and most durable of the three. Cut your chosen material to fit inside the planter, and make it large enough to fold over the edges of the box so water doesn't get between the liner and the wood. Afterward, drill drainage holes at the bottom of the planter in several places. Then, put small rocks or mesh fabric along the bottom to stop the soil from blocking the holes.