Repurpose An Old Box Spring For A Simple DIY Plant Trellis
We may receive a commission on purchases made from links.
When you're looking for a space-saving means of displaying and caring for climbing plants, there are few options better than a budget trellis wall. These structures typically come with plenty of crannies for vines to climb, and a sturdy framework which can be used to easily hang or shape potted plants. You can buy trellis arches at home improvement stores, but you might find you're already sleeping on a more cost-effective option. That isn't an idiom: The box spring under your mattress makes for a great upcycle project. It can be easily repurposed into a simple, sturdy plant trellis with the help of little more than a pair of pliers, a fresh coat of paint, and some elbow grease.
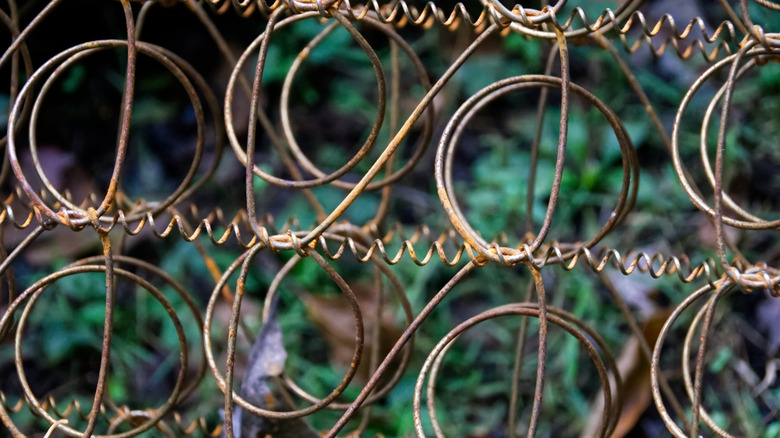
It may seem surprising, but using a box spring as a plant trellis is actually a natural repurpose. A standard model comes with a durable wood frame, internal wire grids, and is built to support one or two adults. Note that there's a difference between box springs and the internal springs in your mattress which also make a great DIY trellis: Box springs act as a foundation or support for your mattress, while mattress springs are inside the part you sleep on.
The only real work that needs to be done to transform this bedroom staple into an outdoor-friendly plant holder involves stripping away fabric and other materials, leaving the metal frame and springs. Beyond its practical benefit, this DIY is highly appealing for being relatively low effort, and exceptionally budget friendly. Mattresses often cost extra to discard and generally can't be donated, so you're saving money there as well. No special tools or skills are required to get started, unless you feel like customizing your new trellis.
How to build your own box spring trellis
Start by removing any fabric, padding, and dust covers from the frame. Take a box cutter to loosen fabric, and pull at it until you've revealed the staples holding it in place on the wood frame and slats. Remove these with a pair of needle nose pliers or a hammer claw. You'll want to ensure the fabric is stripped away entirely, as the material can trap moisture and become a breeding ground for mold or garden pests. This process can be time consuming, particularly your first time around. Expect to spend 1 to 2 hours breaking down your mattress.
Once your box spring is ready to brave the elements, inspect the frame for any sharp metal or splintering wood. Consider sanding or grinding these points down in order to make sure nobody will injure themselves while admiring your garden. Repair any damaged or broken wood, and remove busted springs. Consider coating the metal in a protective outdoor coat of paint or sealant, like Rust-Oleum custom spray 5-in-1 spray paint.
When you're done prepping the box spring and beautifying it to your standards, simply set it up in your garden in either a vertical or horizontal orientation. You can set it in a container garden box or leave it free standing, Securing it to a deck, shed, or fence, if you're worried about it tipping over. Finally you're ready to start planting. Watermelon, cucumber, or canary creeper — a flowering plant that will bring hummingbirds to your yard — are all excellent options for your new DIY trellis.