An Affordable DIY Bench That'll Take Your Outdoor Space To The Next Level
We may receive a commission on purchases made from links.
Your backyard should be a serene place where you can relax and smell the roses. However, what if some of those roses — or other plants — are in pots, and you want them to look nice (and perhaps even elevated) without digging them into the ground?
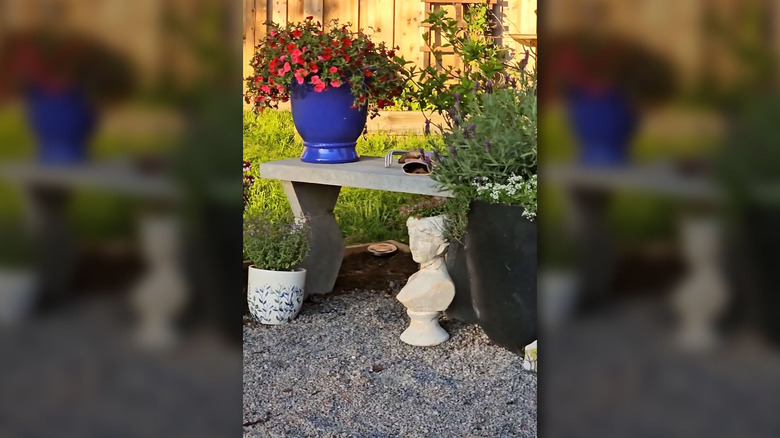
Enter: Display benches for your garden. Not the kind of benches you sit on, but the kind you'd see in a greenhouse, displaying various types of flowers. And while you can always buy various types of patio furniture at a store like Costco, consider building your own concrete bench with just a few affordable materials. You don't need to pour concrete into molds — you can buy the pieces and assemble them instead. Simply apply adhesive to a few concrete pieces, and you'll have a place to display outdoor decor in no time.
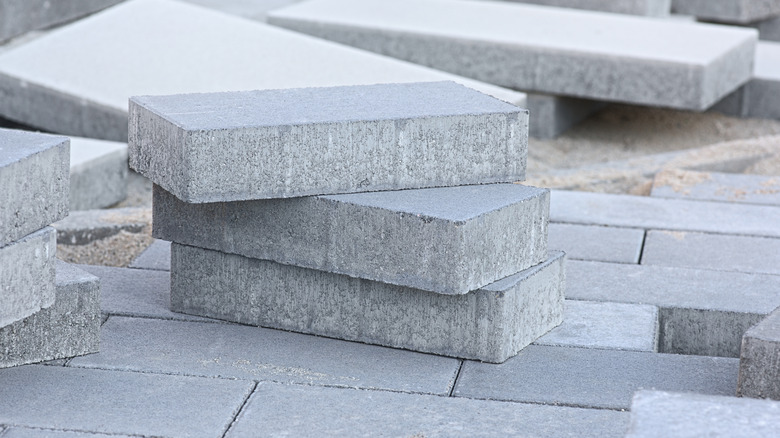
For this project, you'll need a measuring tape, several concrete patio stones, and Liquid Nails Landscape Block Adhesive. The finished bench will add charm to your yard or garden, making the space feel inviting and comfortable. This project will also save you some money, considering that backyard benches can run anywhere from $40 to $200. If you are reusing old concrete stepping stones, make sure to clean them. If dirt remains in their pores, the adhesive may not bond properly. That's why you can use a power washer or a hose and a scrub brush to clean off the dirt. Be thorough, and let the pieces dry completely before applying the adhesive.
How to build a garden bench from concrete
Use a long, rectangular concrete stone for the bench seat. Start by laying it on a flat surface so that the underside — whichever side you choose — faces upward. Measure where you'll attach the legs so they're evenly spaced from both edges of the stone. Then mark them using a pencil. Once marked, apply adhesive along the lines and set the leg stones in position. If the legs need extra height, glue an additional stone to each side, attaching it to the existing legs. Wait 24 hours before flipping the bench upright to allow the adhesive to dry fully.
Keep in mind that this DIY cement bench is best suited for decorative purposes rather than daily seating. Because it's held together with adhesive instead of heavy-duty hardware, it may not safely support much weight. Use it as a garden display spot for potted plants, statues, or other outdoor decor instead. If you need functional seating with hidden storage, there are other types of sleek DIY outdoor storage benches you can make instead.