Repurpose Empty Mason Jars For A Beautiful Garden Cob Wall
If you've made all the DIY mason jar bird feeders you can, and you're looking for a fun, eco-friendly way to repurpose more of them, a cob wall in your garden might be exactly what you need. Cob walls are structures based on an ancient technique utilizing a mixture of clay, straw, sand, and water, which pack together to form a super-dense, durable wall. While the term "cob" might bring to mind corn, in this case it's an Old English word with Germanic roots meaning "rounded lump," as advertised by the lumpy structure of the materials. Earthy textures, warm tones, and beautiful decorative glass work are also hallmarks of a good cob wall, offering a rustic, nature-inspired backdrop.
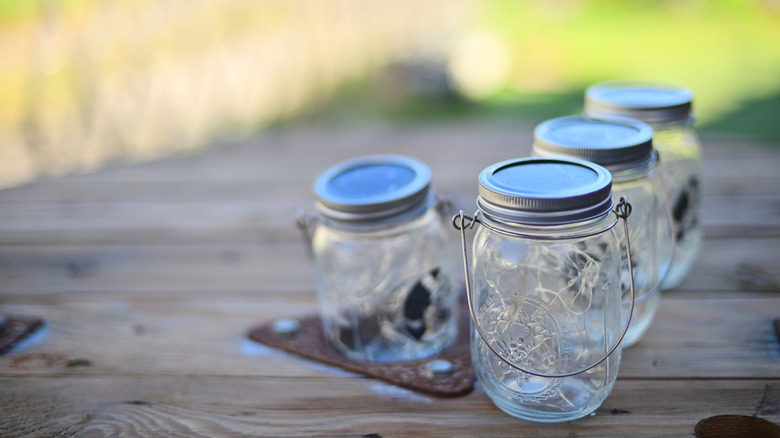
Though the project may seem daunting at first glance, a mason jar cob wall is a great starter project for those interested in building larger structures, creating a DYI concrete cobblestone path, or simply working with ancient materials. To begin, think about the style and look of the wall you're going for, and gather some must-have supplies. You'll need a waterproof tarp, a few 5-gallon buckets, rags, duct tape, and tools such as a drill and shovel. You'll also, obviously, need to source a bunch of dirt, clay, straw, and sand, to mix up your own cob mud. It's also a prudent idea to build on a foundation of large landscaping stones or bricks, to ensure that your wall is sturdy enough to brave the elements of the outside world. And of course, you want a bunch of empty, clean, mason jars or other bottles.
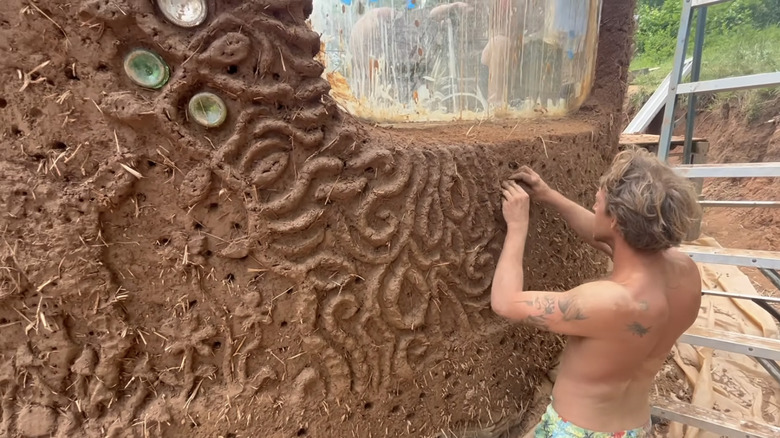
Bottles add structure to cob walls
In order to construct your own cob wall from scratch, you'll have to begin by assembling your cob mud mixture. To do this, simply lay down your sand, water, straw, and clay-rich soil and mix it to the texture of unbaked bread dough. Mixing these materials takes patience, but there are a few ways to make it fun: You can even layer your mixture over a waterproof tarp and stomp it out, as though you were stomping juice from grapes for wine. From there, you'll want to assemble your cob mud along a sturdy foundation, ensuring that your cob mud is layered at least 6 to 12 inches above the ground. Stack your homemade bricks in layers of 4 to 6 inches, and begin embedding mason jars in any arrangement that you see fit. You can stack them like glass block windows to let in light, or pepper them throughout the wall as decorative touches.
Make sure there is at least a couple of inches of cob mud between jars for stability, and face all the ends in the same direction for aesthetic purposes. Once you've got the wall stacked up as high as you'd like, it's time to sit back and let your creation firm up. This drying process could take anywhere from a few days to a few weeks depending on the climate how dry and how thick your wall is. Protect your wall with plastic tarps if it rains during this time.
Customize your cob wall and make it your own
One of the best parts about constructing a cob wall in your garden is the endless number of customizable elements. Since cob is a hand-sculpted material, you can shape it, decorate it, and toss in mason jars to your heart's content. Depending on your aesthetic, and what materials you have on hand, you can throw in multicolored glass bottles for a makeshift stained glass vibe. You can also take creativity further by including colored glass pebbles, tea lights, and other accoutrement inside the mason jars before they're sealed inside the cob.
With practice, you can even customize the cob mud itself by playing with the different ingredients. This means layering your wall with textured imprints, hand-carved patterns, and embedded tiles, geodes, or other features. Plant lovers may even find that cob walls make for stunning backyard plant walls, adding built-in alcoves, sconces, or shelves for fresh flowers. Once the wall is built, you can continue adding color and flair by painting the outside with whitewash or weather resistant paint or adding a few climbing vines.