The DIY Staircase Planter That'll Take Your Garden To The Next Level

We may receive a commission on purchases made from links.
Plant lovers with a penchant for collecting may eventually run out of places to put their photosynthetic possessions. If that happens, though, they can always go up by incorporating a staircase planter. This unique and attractive space-saving plant stand is perfect for stacking greenery in one small area. Its staggered design keeps plants on lower levels from getting too much water or too little sun. In addition to this bevy of benefits, it's also easy to make yourself.
It's as simple as cutting stairsteps into two boards, creating stair stringers, and connecting them. To place your plants, you can use wide window box planters or attach a plank between two stair sides to sit potted plants on. In lieu of store-bought versions, you can DIY an eye-catching planter from an old wine box. Either way, in this form of vertical gardening, you can plant beautiful flowers, start an herb garden, or grow other tasty greens.
Get the necessary tools and materials before you begin. First, you need to know what planters you'll use or if you're using planks. After you decide, grab a framing square and pencil, a circular saw, two treated boards sized to your preference, and of course, the necessary lumber. Finally, you'll need a nail gun or drill/driver for screws to assemble your project and attach planters. Don't forget PPE.
How to make a staircase planter
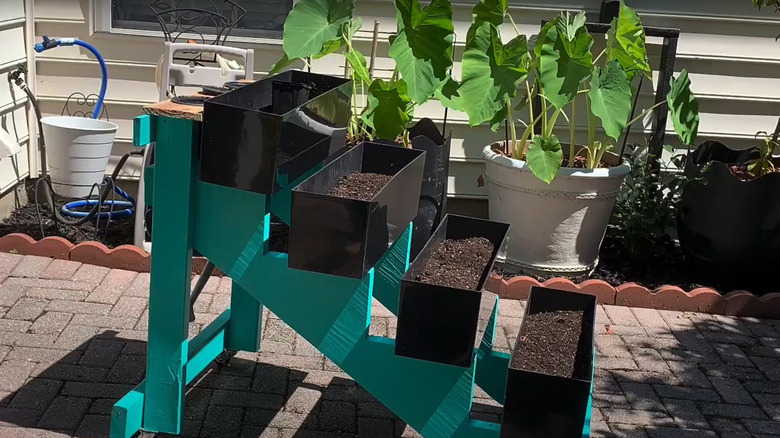
To make your wooden staircase garden, measure and mark to suit planters or a plank that will support plants in separate pots. Leave enough material so as not to create any weak points in the stair stringer. The average stair tread is 10 inches deep and between 7 inches and 7 3/4 inches high. These are typically made from 2x12 boards. Use a circular saw to start the cuts, finishing up inside corners with a handsaw. Alternatively, skip the cutting by purchasing premade stringers and adjusting your design as needed.
Connect the two staircase sides with 2x4 cross braces, using your fasteners of choice. Once the piece is sturdy, attach your planters or planks. If you opt for wide planters, attach them by driving screws or nails through the planters into a step on each side. You may be able to use the drainage holes in the planter. Once the planters are attached, get to gardening.
You can lean your new project against an exterior wall or use scrap wood and screws to attach it to your deck. Set a post in your yard for support if you like. You can also attach legs for a freestanding staircase planter or add casters for one on the go. Customize your planter by painting it or adding shelves, or you can try enclosing the back and sides and attaching a door so your planter can also hold gardening tools and supplies.