Repurpose An Old Toolbox For Extra Garden Storage Space Without A Shed
When you're busy working in your garden, your tools can get unorganized pretty quickly, especially if you don't have a shed or if it's currently overflowing with gear. Fortunately, there's more than one solution to this simple problem. You could organize your tools with an old shovel or perhaps store them in a versatile DIY shed from Costco. Of course, if you've got an old toolbox lying around, you could turn that into a unique storage space. This DIY project will work well attached to your garage, deck, or porch — anywhere near your garden.
If you don't have a toolbox, they're readily available at flea markets, antique shops, and yard sales. Since you'll be hanging this toolbox outdoors, a metal one might be your best bet despite potential rust. A plastic one can work, but they typically lack the charm of an old toolbox. Wooden toolboxes will work as well, but you'll want to refinish them with an outdoor paint or protective finish. Besides that, you'll need brackets, hardware to hang them, self-tapping all-purpose exterior screws, and a cordless drill and driver.
With your vintage toolbox and supplies ready, the first thing you'll need to do is attach a block of wood to your exterior wall. This mounting board should be as long and as tall as the toolbox (not counting the lid) and a little thicker than the lid is deep. This allows the lid to open all the way for easier access to the tools inside without the wall limiting its range. Mount the board to a wall using at least two or three exterior-grade screws of appropriate length. Clean up the toolbox by emptying its contents, wiping it down with the cleaner of your choice, scrubbing off stickers or rust, and painting it if you like.
How to make extra garden storage with your toolbox
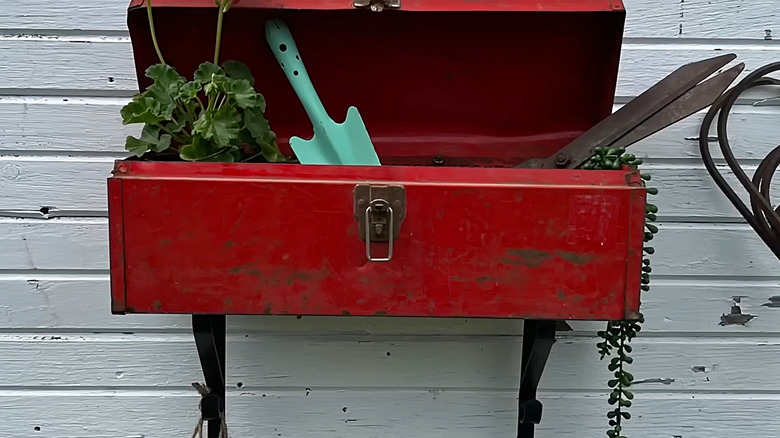
Now that you've done the prep work, it's time to assemble and hang your toolbox. First, drill two hanging holes into the back of the box. You'll drive screws through these holes to attach the box to the mounting board. Ensure your screw hole locations don't interfere with the screws holding the board to the wall. Then drill holes in the bottom of the toolbox where you want to hang the brackets. While working with the bottom of the box, drill at least a couple of holes for water drainage when it rains.
Next, attach the brackets. These brackets aren't structural — they're just for aesthetics — and you won't need to screw them into the wall. With the brackets attached, drive all-purpose screws through the inside of the toolbox into the block of wood mounted to your wall, keeping things level. Fill it up with your valuable garden tools, and take a moment to appreciate your cool DIY repurposing project.
A great feature of this project is that you don't have to keep it mounted to the wall. You can attach keyhole fasteners to the back of the box, and this will allow it to hang solidly and pull up and away from the wall if you want to take more than a couple of tools with you. In this instance, you may want to attach the brackets to the wall so you can sit the box wherever you need.