How To Easily Install A Wood Fence Without Pouring Concrete Bases For The Posts
We may receive a commission on purchases made from links.
When it comes time to build a fence, many people think that concrete bases are the sturdiest bases for posts. However, this is actually far from the truth. When you fill a post hole with concrete, you trap the post in a barrier that allows water to get in but not to escape. The post will remain moist below ground level until it rots away, which is one of the telltale signs that you need to replace your fence. Then, if you decide to replace the post, you'll have to break up and remove the concrete. There's an easier, less expensive method, and once you know it, you'll never switch back to hauling bags of concrete. Just add some gravel below the post and tamp soil down around it. This will allow groundwater to either seep deeper into the soil or evaporate completely. The post will also be just as sturdy as it would have been with concrete.
The job requires fewer supplies and tools than you would use for concrete bases. You'll need a measuring tape, a level, gravel, an 8-inch-wide transfer shovel, one Truper Tamping Bar, two C-clamps, two 1½ by 2-inch boards, a pair of work gloves, and as many fence posts as the job requires. Before you start digging, it's important to call or visit the website of your state's 811 service to check for utility lines. Not checking for utility before digging is one of the dangerous mistakes someone can make before installing a fence.
The process of installing a fence post without concrete
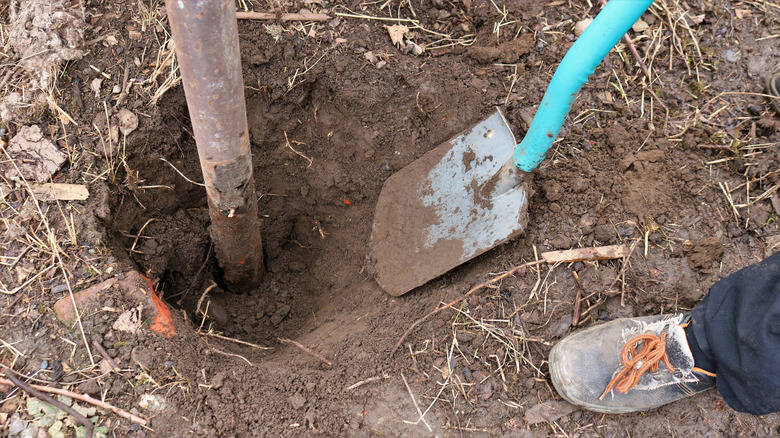
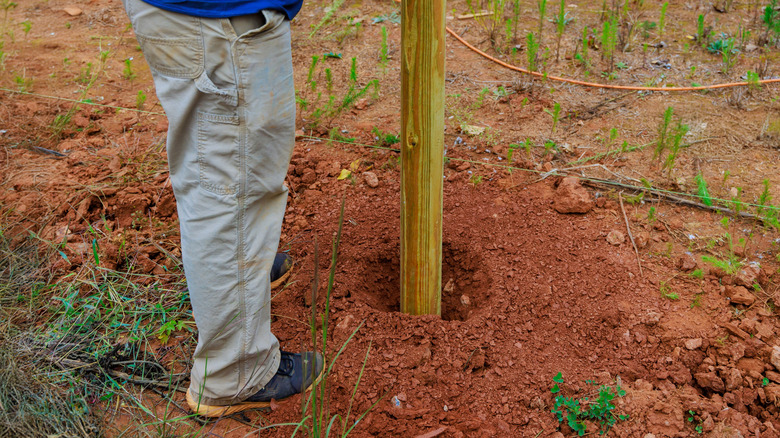
Once you have selected a spot for your post, use your shovel to dig an 8-inch by 8-inch hole in the shape of a square box. One tool might also make installing a fence easier. As you dig deeper, the soil will probably become firmer, and you may even hit clay. That's why it's helpful to use the pointed end of the tamping bar to break up the tough soil. Once the hole is about 22 inches deep, scatter some gravel at the bottom before placing your post. One of the sensitive parts of the job is making sure the post is plumb, meaning that it is at a 90-degree angle with the ground. To get your angle right, attach the two 1½ by 2-inch boards to the post using your c-clamps and allow the boards to support the post as you adjust it with your level. You should place the level vertically along the side of the post, and you'll know the post is plumb once the bubble in the level rests between the black lines.
Once the post is straight, it's time to fill in the hole around it. Add 4 inches of dirt at a time, and use the flat end of the tamping bar to pack the dirt. Check to make sure that the post is still plumb throughout this process, and do not remove the braces until the hole is filled and packed tightly with dirt. The post should stand strong for several decades. Once you install all your posts, add the rails, and attach your pickets, your fence should add more privacy to your backyard.