Organize Your Garden Tools With This Old Shovel DIY Project
We may receive a commission on purchases made from links.
There is no shortage of good gardening advice to keep you cultivating. You can find everything from how to build a raised garden bed on a budget to the many reasons you should use mulch. There also seems to be no end to the number of things we need to keep organized. We even find ourselves curating items past their prime or perhaps no longer in use. This horticulture hack shows you how to make a tote or caddy for your gardening tools while clearing out some space in the shed.
Of course, you want your tools organized so you can quickly grab what you need. It's always nice to have a tidy place for everything. However, gardening tools also need to be portable. In other words, you want to arrange and stow them away when not in use, and easily transport them to your garden when it's time to dig. A shovel handle cut short can be incorporated with wood offcuts to create a portable, ergonomic tool tote. Clear clutter and organize your gardening gadgets simultaneously with this two-birds-one-stone approach.
A tote dedicated to your garden tools is a must-have for any serious gardener. To make your garden tool caddy with a shovel handle as its handle, start by gathering the materials you'll need. First, find an out-of-service shovel that you don't need anymore. Next, grab a few wood scraps or offcuts from past projects. Then, collect the tools you intend to tote and head to the shop.
How to make a garden tool tote using a shovel
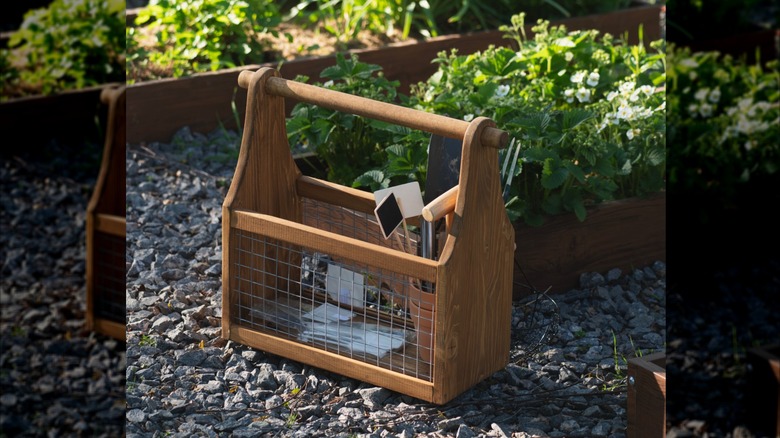
Make sure you have enough material to account for the length of all the gardening tools you need to carry. Besides the shovel handle, pull two long sides, two short ends, and a bottom from your scrap wood. For the sides, consider chicken wire scraps. For the bottom, try two narrow boards for drainage. If your shovel handle is long enough and you have plenty of wood, build totes to hold tools for different jobs.
After determining your dimensions, rip-cut the side to width (how tall the sides will be) and crosscut them to length. Rip the ends to width (how wide the tote will be). The ends of traditional totes taper toward the top. This reduces weight and makes for a clean look. Before crosscutting the ends to length (how high up your handle will be), ensure you have room to grip the handle without scraping a knuckle on the tools inside. Drill holes in the ends for the shovel handle and cut your bottom to size.
Assemble opposite corners using nails and glue. Wood glue, such as Titebond II is perfect for outdoor projects. Slide the shovel handle into one end, attach the other end, then fasten the bottom. The handle should be smooth from wear, but if it's splintery, sand it for a comfy grip. While you're at it, soften sharp corners. For a protective finish, outdoor oil-based varnish works great. Milk paint holds up well outdoors, too. If you're looking for another DIY space-saving solution that can fit more than this project, you can always reuse wood pallets for a larger tool storage system.