Repurpose These Household Staples And Turn Them Into A Stylish Gothic Planter
We may receive a commission on purchases made from links.
Gardening is an excellent creative outlet — from just a bit of dirt, you can grow colorful blooms or delicious fruits and vegetables. Your ingenuity can be applied to designing and theming your garden containers, too, repurposing items into eye-catching DIY planters without much effort or cash. Whether you have a full-scale goth garden or just want classic Victoriana highlights, the gorgeous gothic birdcage planter that TikToker Witchelixer whipped up with an eclectic mix of odds and ends — a patio table umbrella stand, a rolling pin, some wood rounds, plates, metal mixing bowls, wooden wreath forms, dowels, adhesive, and some decorative elements. She completed her moody, elegant creation with black spray paint and a lush plant.
If you'd prefer a less labor-intensive activity, it's possible to get a similar look with some smart thrifting. For instance, instead of building the structure entirely from scratch, you could pick up a used birdcage from a local thrift store. A metal outdoor side table or a sturdy plant stand can also serve as a base. If you'd prefer a lighter or calmer vibe, paint your creation sage green or a bright white or vibrant yellow hue. And if you'll be buying something new for your container, you could pick a fuss-free plant that still looks attractive without requiring a lot of work to take care of. Another option: Choose a low-maintenance plant and flower combination like sweet potato vine and petunias to create a simply beautiful container garden.
How to create a birdcage planter
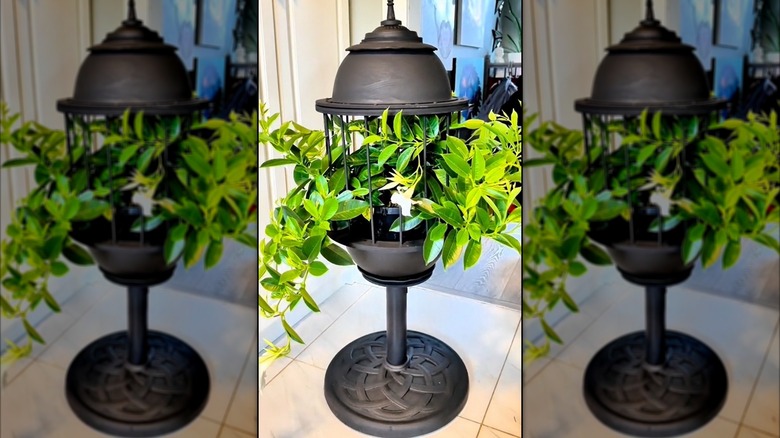
To follow Witchelixer's planter-building method, you'll first need to create a sturdy central column to hold your planter. Begin by removing the handles from a rolling pin and inserting it into the tube of your umbrella stand. Next, attach a plate or wood round to the top of the rolling pin using a strong, outdoor-hardy glue like Gorilla Glue. For an extra decorative touch, glue on progressively smaller plates or wood rounds for a tiered effect.
Next, assemble the planting container itself. If you'll be using a thrifted birdcage, glue it to the base you've created. Otherwise, put together your own planter by adhering a metal mixing bowl upright to your base. Apply glue to the holes of a wreath form, insert the dowels, and then top each dowel with glue before inserting it into the second wreath form. This will create the cage-like exterior that you can glue to the top of the mixing bowl that's already been placed on the base. To make your decorative lid, take your second mixing bowl and place it bottom-up on top of your DIY birdcage. You can add extra detail to the cover by gluing a finial or other decorative item, like a charming bird or frog figurine, to its bottom. Once your planter is assembled, give it a coat or two of spray paint in your favorite color. Let it dry in the sun before adding a good potting mix and nestling your flowers or greenery inside, and enjoy your stunning new creation!