DIY A Solar Light Centerpiece For Your Outdoor Table With These Dollar Tree Items
There's something wonderful about dining outside, whether it's a quiet weeknight dinner for two or a festive backyard BBQ with lots of friends and family. But if you don't have enough outdoor lighting, your table may be dark and uninviting once the sun sets. String lights can be expensive and tricky to hang if you don't have a well-placed outdoor outlet or a steady ladder, and open-flame torches can be messy and dangerous. Similar to this Dollar Tree lighting hack that adds style to your yard, a video from Liz Fenwick DIY shows how you can easily craft a handcrafted solar-powered centerpiece. The video shows how to make a practical table fixture using inexpensive solar lights from Dollar Tree, a piece of wood, and a small assortment of tools and supplies. These lights go on automatically at dusk, and you can easily move the centerpiece to where it's needed most.
An outdoor solar table lamp or string of solar-powered string lights would cost many times what you'll spend crafting this centerpiece, making it a thrifty and eco-friendly way to brighten your backyard. Before heading out for supplies, measure the table space you want to cover and determine how many lights you'll need. You'll need a piece of lumber for the base, your preferred stain and/or sealant, sandpaper and brushes, and a drill with spade bits or a hole saw attachment like the one used for our DIY bird house. Make sure you have an attachment that matches the width of the light supports, regular drill bits usually won't do. You can probably gather everything in one hardware store trip, and once you have these supplies this DIY will come together quickly into a practical, pretty solar light centerpiece.
How to make a solar light centerpiece
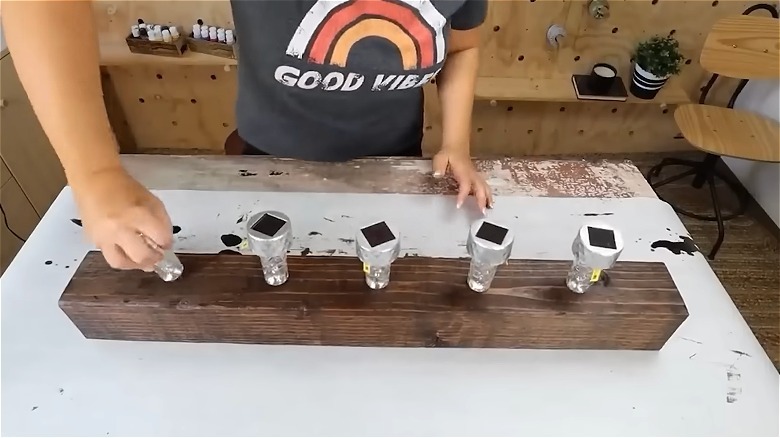
Begin by selecting a piece of wood that fits on your table and provides enough stability; a short 4x4 works well in most cases. Most stores will cut wood to length for you or you can buy a long piece and cut it yourself. Sand it smooth with an orbital sander or a sanding block, starting with a coarse paper and working your way up to 220 grit or so. Once the wood is ready, measure and mark evenly spaced spots where the lights will go. Measure your lights at their widest point and make sure to allow enough room between each opening. Remove the pointed stakes from your solar lights and set them aside. Next, use your drill and the appropriate attachment to make holes that are wide and deep enough to snugly hold the light bases. Apply your desired finish and wipe away any excess with a paper towel before installing the lights; this will give your creation a neat look to complement your outdoor furniture.
Allow the stain to dry completely and with the ground stakes removed, place each light upright in its hole. Use a file or rotary tool to make the holes a little wider if necessary, and silicone sealant or an all-purpose adhesive like Gorilla Glue can help hold wobbly lights in place. Once everything is set and dried completely, all that's left to do is put the centerpiece on your table and wait for sundown. As the evening grows darker the lights will automatically come on, illuminating your table and creating a wonderful outdoor spot for dining or chatting. This handy and inexpensive DIY is another example of how sometimes the best home decor items are the ones you make yourself.