How To Add New Life To Your Shutters To Boost Curb Appeal
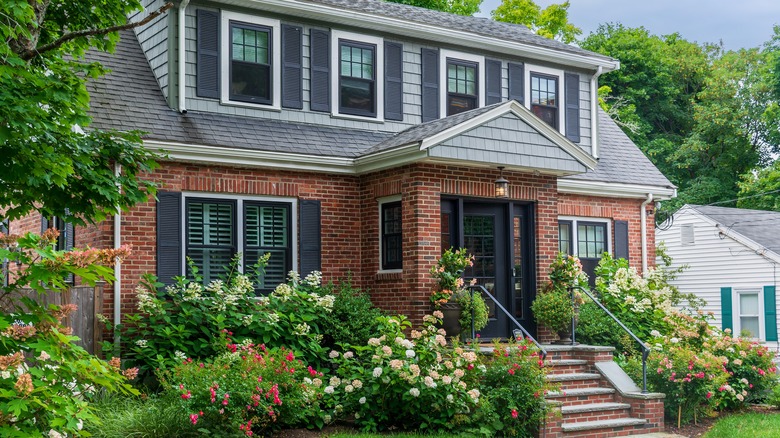
If your home has decorative shutters around its windows, when was the last time you upgraded them? If your shutters are old and falling off, replacing them entirely is a good option. For shutters that are beyond repair, you can repurpose them for use in your garden. However, if they are looking a little sunfaded or worse for wear, but still have life in them, there's something you can do to make them look new again — repaint them. This is more affordable than replacing them altogether, and it gives you a chance to make some color changes, too. Black is a popular exterior shutter color for homes, making it a sleek choice. You could also take a look at the color wheel interior designers use and choose a tone that complements your home's exterior paint. Say your home has a reddish or salmon tone, a green shade for your shutters in the same richness would make your property really stand out. While you're doing upgrades for curb appeal, you should also consider some low-maintenance landscaping ideas for your front yard.
The type of paint you use for this project will depend on the material your shutters are made from. Wood shutters can be redone with exterior wood stain, while a weather-resistant acrylic spray paint will work just fine on vinyl shutters. If your shutters are aluminum, that same acrylic paint will also be fine. Before grabbing a can of paint, though, it's essential to know what steps to take for great-looking shutters.
How to paint your shutters for a fresh look
You'll need to remove your shutters and clean them well before you start painting. When you take them off, be sure to put the nails or plastic pegs that hold your shutters on in a baggie for safekeeping. One way to ensure your shutters are clean is by using a mixture of equal parts vinegar and water. This is just one of the many uses vinegar has for your home and yard. The reason for cleaning thoroughly before painting is to remove as much dirt and debris as possible, resulting in a smooth, even finish with minimal cracking. It's also important to let your shutters dry completely before starting to paint.
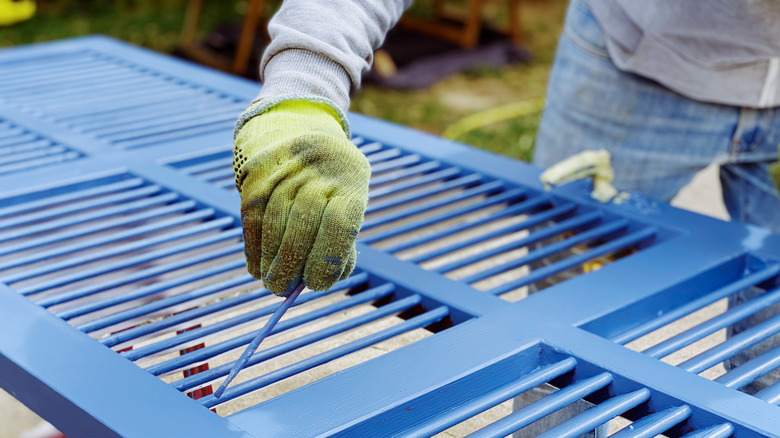
When your shutters are dry, place them across a couple of sawhorses in a well-ventilated area, preferably outdoors. If you don't have any sawhorses, you can place them on some plastic instead. You may want to wear protective gear, like gloves and a mask. For plastic and vinyl shutters, you can use a spray paint that is labeled as vinyl-safe. While you can use regular outdoor paint and a brush or roller, spray paint will make the job quicker and easier. For a smooth finish, spray the paint on in sweeping motions. For wood or metal shutters, you need to first sand off the original paint job before applying the new color.
You will want to apply a coat of primer if you're implementing a drastic color change. Otherwise, two coats of paint will get the job done, taking care that the paint is dry before applying the second coat. Then, when your shutters are completely dry, reinstall them. If your hardware no longer matches your shutters, you will either need to paint it or replace it before reinstallation.