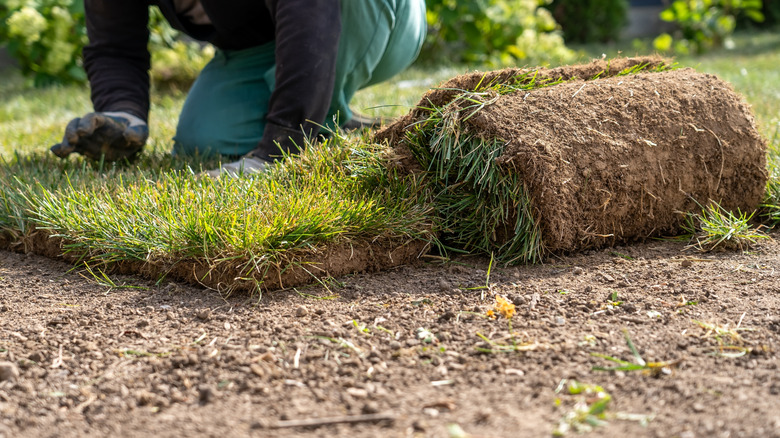
Soil Prep Tips To Know Before Installing New Sod
We may receive a commission on purchases made from links.
Perhaps your lawn has been growing in patchy and you've struggled to solve the issue. Maybe you've just built your dream home and quickly want the perfect lawn to match. Or, you may be fighting a never-ending battle against bugs in your existing lawn. Whatever the reason, if you have decided to install sod, there is more to it than just rolling out a new layer of grass. The soil on which the new sod will rest needs to be properly prepared so the grass can take root and thrive. Otherwise, you may find your new lawn winds up needing to be replaced sooner rather than later, and you haven't solved any of the previous issues.
Some steps in the soil preparation process will be the same no matter what. Others will be guided by whether you have a new or existing lawn and what type of sod you intend to install. If you are replacing an existing lawn due to some sort of issue such as brown patches, pervasive weeds, or invasive insects, you will need to address the underlying cause for those problems, lest they will occur once again as your new lawn becomes established. These previous problems — along with your geographic region — can also play a role in the type of grass you choose to sod. Once you choose a sod, you will also need to keep in mind any particular needs that type of grass requires as you prep the soil for installation.
Test your soil then determine the total area
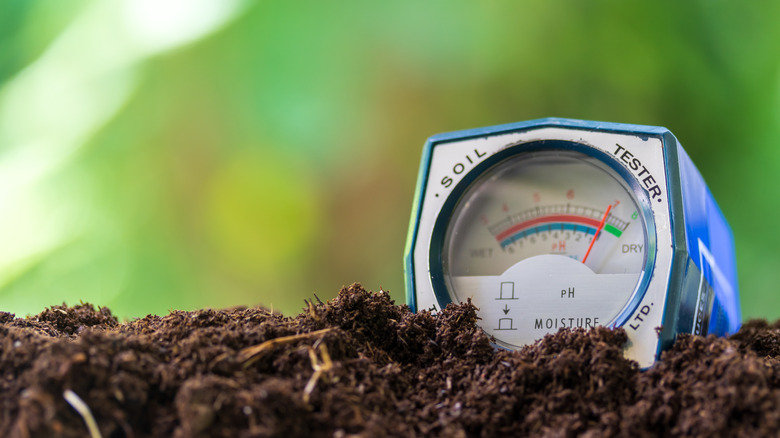
Once you've committed to installing new sod, the soil preparation process begins. Determining the pH of your soil will be right at the top of the list of things you need to do. In fact, you will need to do it more than once. It is a good idea to test the soil prior to beginning any soil preparation, giving you a baseline to begin understanding what amendments may be needed. However, you will need to continue testing throughout the soil preparation process, as well as after any amendments are made or topsoil is added. Luckily, soil testing is easy to do with devices such as the Luster Leaf 1880 Rapitest 4-way electronic analyzer.
While a soil test may tell you what is needed, it won't tell you the quantity you need to buy. For that, you need to determine the area of your lawn. The area not only dictates how much sod you need, but also the quantities of other necessary supplies, such as fertilizer. Unless you have a perfectly square or rectangular yard, you may find it easiest to determine the area by dividing your lawn into smaller sections and basic geometric shapes, then adding the area of each section to get the combined total area. At that point, subtract any structures such as sidewalks, driveways, or flower beds to give you the total surface measurement of areas to be sodded.
Remove grass, weeds, rocks, and debris
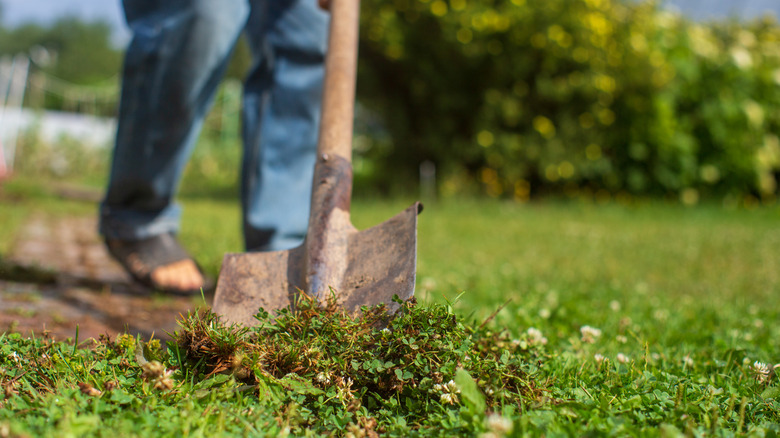
If you are resodding an existing lawn, the next step is to remove all the current grass from your yard, or at least from the areas to be resodded. There are a number of ways in which this can be done. If you won't be resodding for quite awhile, you can smother your existing lawn with layers of wet cardboard or newspaper. As the grass dies, it naturally composts into the soil. This method — typically started in the fall so the ground is ready for a spring sodding or planting — involves the least labor of any means by which grass can be removed. However, it also takes the longest.
Those on a shorter time frame can use chemicals or physically remove the old grass. The upside to using an herbicide is that it acts fast and kills both grass and weeds. The downside is you have to wait for a period of time before resodding to ensure it doesn't kill the new grass. Physical removal can be done using a variety of implements ranging from a sod cutter to a shovel, depending on how large a space you have and how much work you're willing to do.
Whether you are starting a new lawn or replacing an existing one, you will also need to make sure the area to be sodded is cleared of any debris: All stumps, rocks, stones, and big limbs need to be removed. At new or recent construction sites, there may also be bits materials like boards, nails, and concrete that need to be cleared. You may also find emerging weeds on your new construction lot that will need to be taken out before your new sod is installed.
Level and grade your lawn
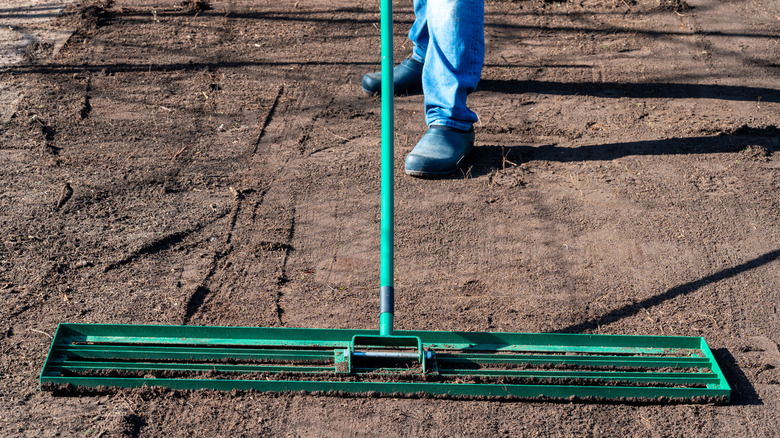
If you have been frustrated by a bumpy, uneven lawn, now is your time to fix it. In fact, it's a pretty important step in preparing the soil for successfully installing new sod. A leveling rake is a must-have tool for leveling your lawn. Even then, you may find it necessary to add soil to low-lying areas. Keep in mind, any dirt brought in from elsewhere can change the composition of the soil. Work the area until you are able to even out as many of the bumps and dips out as possible. Then let the soil settle for at least a week before the final grading.
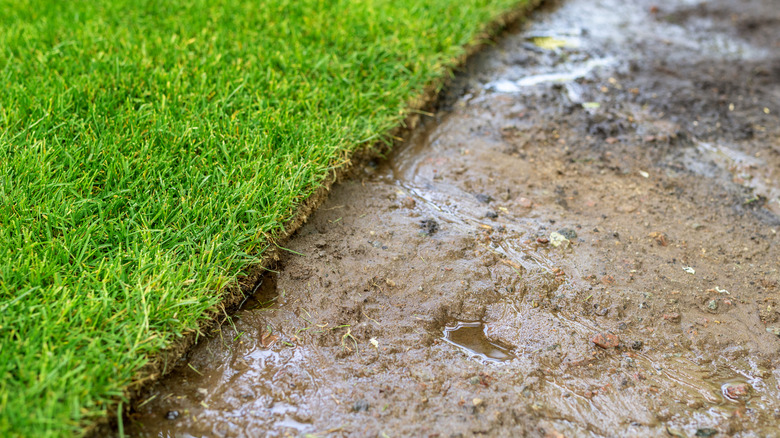
Ideally, the surface of your lawn should be smooth and leveled. However, it should also be slightly graded for better drainage. This grade does not need to be overly steep. A good rule of thumb is 1 foot of drop for every 50 linear feet to create good drainage without the risk of erosion. While this can be accomplished with hand tools, it is usually best to use a tractor and box grader attachment for large lawns (while you're at it, use the box grader to remove potholes from your gravel driveway). As you work the soil for leveling and grading, be sure to remove any objects or debris that may have been buried and previously unseen.
Till and add topsoil as needed
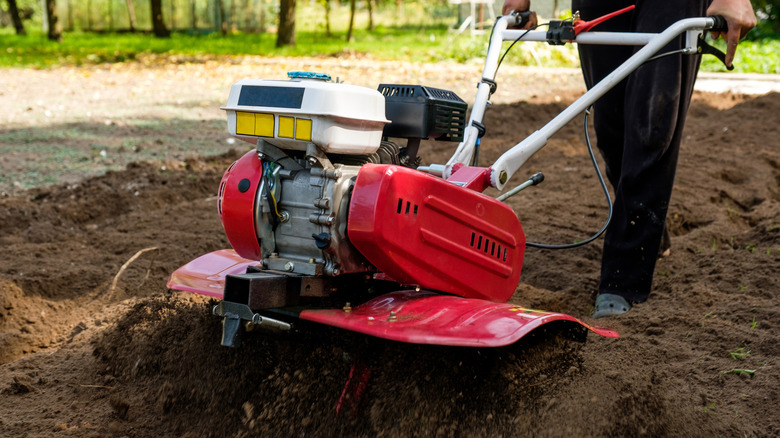
The next step is to address your topsoil and till the area. Tilling will make it easier for sod to successfully bond to and for grass roots to penetrate the soil. If you are adding topsoil, till the top 2 inches of the existing soil, then add about 4 inches of new topsoil. Should you choose not to add any extra topsoil, till down to around 6 inches deep. Again, it is important to remember that adding topsoil necessitates another test to assess the soil's pH levels.
This is also the time to add any irrigation or drainage systems you want to install. For instance, if you have extremely low spots that can't be filled or leveled, you may need to consider adding a French drain in your yard to help prevent pooling water. Both irrigation and drainage is easiest to do so before installing new sod. However, you should be sure to grade and till the area and add any necessary topsoil first, so that you don't bury or damage these newly installed systems.
Amend, roll, and water the soil
Once you've gotten past those steps, it is time to test the soil one more time. Then, using the information you've gathered throughout the soil testing, apply whatever amendments are required based on that final data. Be sure to work any sulfur, gypsum, or lime into the top few inches of soil to bring the soil to slightly acidic levels (pH 6.5 or so). After the soil has been amended, it is still recommended to add a general or start type fertilizer mix to help provide the newly laid sod grass a nutritional boost as it takes root. Be sure to rake in the fertilizer so it mixes with the top layer of soil.
Lastly, there are a couple of more things to do before installing new sod to ensure it takes hold and grows properly. For one, if you have a loose layer of topsoil, roll or tamp it so that it is fully settled. Secondly, water the area. This serves to further settle the top layer of soil. It also helps the roots of the newly installed sod to grow quickly. However, water just enough to where the top layer of soil is moist but not saturated before the sod is installed.