How To Direct Sow Seeds And The Best Time To Do It
We may receive a commission on purchases made from links.
Over the past decade, gardening has become substantially more popular in the United States, likely because there are numerous reasons gardening is good for your health. While one of the main positives is spending more time outside, quite often seeds are started indoors, then transplanted outside later on. Some even forgo seeds altogether and purchase seedlings. While both of these methods can be effective means for growing a garden, directly sowing some seeds can be the most efficient and economical method. This is the process in which seeds are planted in the ground outdoors as opposed to being started indoors. The key for success is knowing how to direct sow seeds and the best time to do it. The general process involves preparing the soil and seeds, planting and covering them, then marking their location and watering.
The ideal time for this depends on the type of seeds and where you are located. Commercially-purchased seeds, like Burpee Straight Eight Cucumber Seeds, have guidelines for when to plant printed on the back of the packet. Different types of plants have differing timelines, which means you may not be sowing your entire garden all at once. Plan out your garden to ensure adequate space is available for seeds sown later.
In general, warm-weather plant seeds should be sown after the threat of frost has passed. For some varieties, including the aforementioned cucumbers, the soil must warm significantly above frost temps for proper germination. You can use online resources like the Greencast Soil Temperature Map to find the current soil temperature in your area. You can also utilize a device like the Urban Worm Soil Thermometer.
Properly prepare the soil and seeds
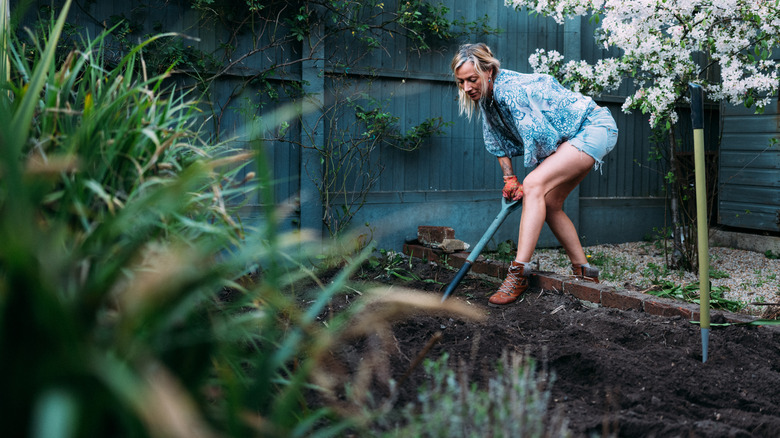
Failing to properly prepare the soil is a common beginner gardening mistake you want to avoid. Conversely, proper preparation can help ensure bountiful harvests. For this, you will need a handful of garden implements, such as a garden fork or spade, trowel, shovel, rake, and mister hose. It's also a good idea to have a device like the Sonkir Soil Tester to ensure the soil has the proper pH level for the seeds you intend to plant.
Once the tools have been gathered, begin preparing the soil in your garden plot by removing any weeds or plants. Next, loosen the soil with the garden fork or spade. It is advisable to work the soil to a depth of about 8 inches. After loosening the soil and breaking up any large clumps of dirt, smooth and level the entire plot with a rake. At this point, you should test the soil and make any amendments necessary based on the test results and the needs of the seeds you intend to sow.
As you are preparing the soil in which they will be planted, the seeds should also undergo any necessary preparations. Again, referencing the seed packet will help direct you as to how and if the seeds need preparation. Some seeds may require scarification, which involves damaging or removing part of the outer shell. Others may need cold stratification in the refrigerator, or you may need to soak seeds in the common kitchen staple vinegar or water ahead of time to help them germinate. Each of these processes take varying amounts of time and should be planned with the ideal time for sowing the seeds in mind.
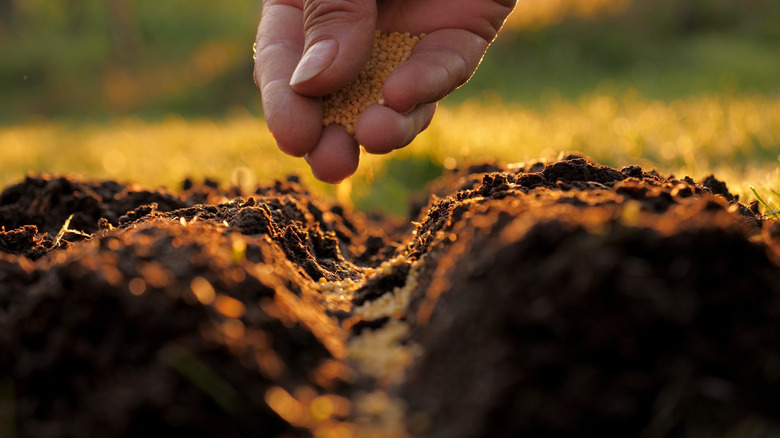
Sow, cover, mark, and water
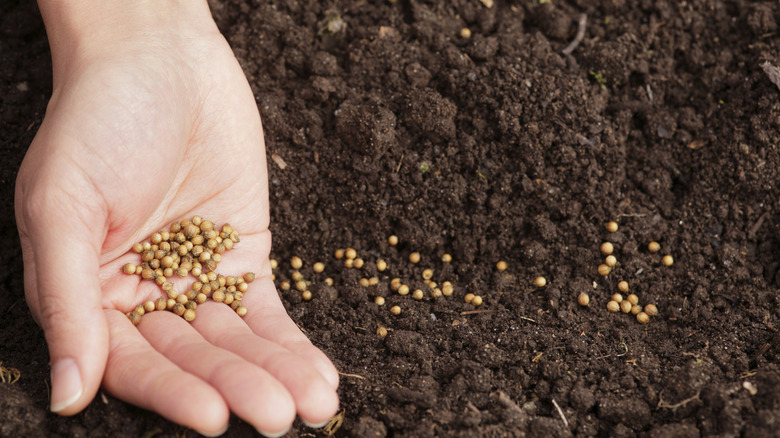
Referencing the seed packet will guide you on the depth seeds should be sown, as well as the proper spacing between plants. If you don't have access to that information, a good general guideline is to plant seeds at a depth of double their width. When in doubt, err on the side of shallower, as planting seeds too deep can prevent them from germinating. The smallest seeds may only need be sown on top of the soil.
Seeds should be covered once planted. Those that have been planted very shallow or sown on top of the soil may only need to be brushed over with a broom to get them enough soil coverage. This step is important, however, as it gives the seeds access to the warmth and moisture of the soil while protecting them from birds, insects, and animals. To help you remember what has been planted where, put marked stakes at the end of each row.
Once the seeds have been planted, it is essential that the soil remain moist while they are germinating and sprouting. Water your newly-planted garden with a gentle mister spray so as not to dislodge the seeds from the soil. You should continue with regular waterings, being careful to keep the soil moist but not waterlogged. As new sprouts begin to emerge, monitor their growth and thin any clumps of plants that are growing too closely so as to prevent overcrowding when the plants mature. It is important to continue watering with only a light mist at this stage to avoid harming the fragile seedlings.