Genius Hacks For Starting A Campfire
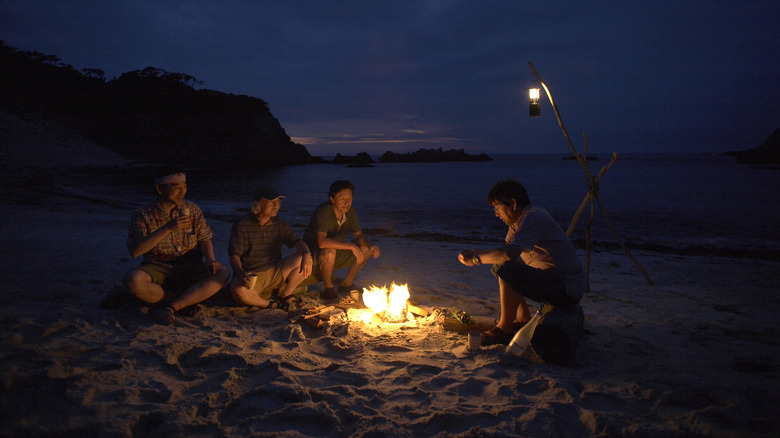
In the heart of nature, where the whispering leaves and the crackling flames create a symphony, lies an age-old ritual that transcends time — the art of building a campfire. Whether you're a seasoned outdoors enthusiast or a novice camper, the allure of sitting next to a roaring fire under a starlit sky is undeniable. Yet, starting a campfire can sometimes feel like a daunting task, especially when faced with challenging conditions. Worse off, what if you've forgotten to bring your essential fire-starting items?
Fear not, as we unveil an arsenal of genius hacks that will transform you into a campfire virtuoso. From prepping fire-starters in advance using common household items to igniting flames with common camping gear, we're here to help you master the perfect fire lay, these expert tips and tricks will not only make you a fire-starting maestro but will also add an extra layer of magic to your outdoor adventures. So, gather around the virtual campfire, and let's explore the ingenious ways to kindle the warmth of nature's embrace.
Dryer lint and egg cartons

This DIY fire starter from The Things We'll Make will save you a trip to the convenience store for a fire starter since it only uses common household items that might otherwise be discarded. Here's what you need: dryer lint, an empty cardboard egg carton, candle wax or old candle stubs, a small saucepan, a paintbrush, and some scissors.
Start by gathering lint from your dryer's lint trap. Lint is highly flammable and makes an excellent fire starter due to its fibrous and easily combustible nature (via National Park Service). Then, take an empty cardboard egg carton and cut it into individual egg cups. Stuff each egg cup with dryer lint, pressing it down to compact it. Fill each cup to the top, leaving some room for the wax. In a small saucepan, melt candle wax over low heat. You can also use paraffin wax or old candle stubs. Using a paintbrush, generously apply the melted wax over the dryer lint in each egg cup. The wax serves as a fuel source, enhancing the flammability of the lint. Let the wax-coated lint in the egg carton cups cool and harden. Once the wax has completely hardened, cut or tear apart the individual egg cups. Each cup now functions as a standalone fire starter.
Keep your homemade fire starters in a cool, dry place. When you're ready to use them, simply place one or more in your campfire pit or fireplace, ignite the dryer lint, and watch as it quickly catches fire and helps ignite the rest of your firewood.
Dorito fire

Creating a campfire starter using Doritos is a unique and surprisingly effective hack to kick-start your outdoor fire-making experience. The high fat and oil content and flammable nature of Doritos make them a utilitarian choice for kindling (via WiseGEEK).
Lay out a handful of Doritos in the center of your fire pit or designated fire area. Arrange them in a way that allows for air circulation and easy access for the flames. Place your firewood or additional kindling over and around the Doritos. The Doritos will serve as the initial source of ignition, and as they burn, they'll help catch the surrounding materials on fire. Using a lighter or matches, carefully ignite the Doritos in multiple locations. The high-fat content of the Doritos will also act as a fuel source, and the flames should quickly spread to the surrounding kindling and firewood. The Doritos should continue to burn and contribute to the overall combustion of the fire. As the Doritos burn, they might add a subtle aroma and flavor to the surrounding air, providing a unique twist to your outdoor experience.
It's important to note that while using Doritos as a campfire starter can be a fun and effective hack, it's essential to follow safety precautions and local regulations when building and maintaining fires. Additionally, be mindful of the environment and clean up any remnants of the Doritos after the fire has burned out.
Cotton balls and petroleum jelly
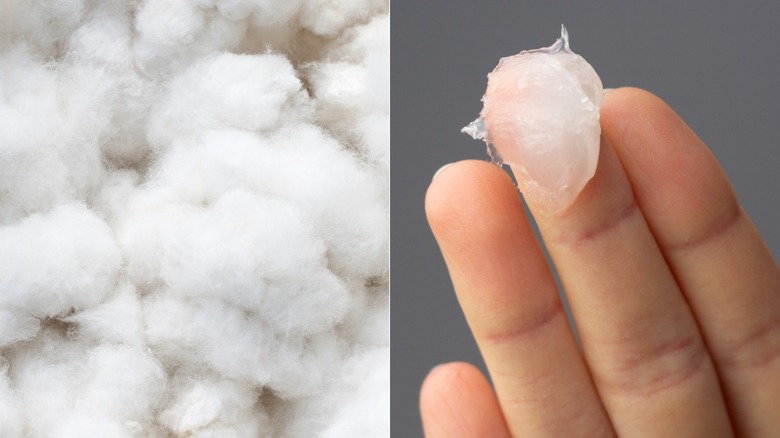
Using cotton balls and petroleum jelly as a fire starter is a popular and reliable camping hack. This combination creates a highly flammable and long-lasting fire starter that is easy to make and carry. Here's a step-by-step guide on how to create and use cotton balls and petroleum jelly fire starters:
Start by fluffing up a few cotton balls to increase their surface area. You want them to be airy to catch fire easily. Spread a small amount of petroleum jelly onto cotton balls, ensuring that it gets absorbed and coats the entire surface. The petroleum jelly acts as a fuel source, making the cotton balls highly flammable, however, this is only once the jelly has been turned to liquid, according to Ramblin' Jim. Place the petroleum jelly-coated cotton balls into an airtight container or a resealable plastic bag. This keeps them compact, prevents the petroleum jelly from evaporating, and makes them easy to carry in your camping gear.
When you're ready to start a fire, take a few petroleum jelly-coated cotton balls from your container. Place them in the center of your fire pit or designated fire area. Using a lighter or matches, carefully ignite the petroleum jelly-coated cotton balls in multiple locations. Once heated, the cotton balls will catch fire quickly. As the cotton balls burn, they will provide a sustained flame that helps ignite the firewood or kindling. Monitor the fire and add more fuel as needed.
Crayons

Crayons are made of paraffin wax, which is highly flammable and can serve as a fuel source for starting a fire. In order to create your crayon fire starters, Instructables recommends starting by removing the paper wrappers from the crayons as they are not combustible and can interfere with the ignition process. Next, break the crayons into small pieces, making it easier for them to catch fire. Smaller pieces will melt more quickly, providing a more efficient ignition source.
Prepare your fire pit or designated fire area by arranging firewood or kindling over and around the area where you'll be placing the crayon pieces. Ensure proper ventilation and space for the fire to grow. Scatter the broken crayon pieces in the center of the fire pit or on top of the kindling. Distribute them evenly to maximize their coverage and facilitate a quick and even ignition. Using a lighter or matches, carefully ignite the crayon pieces. The crayons will melt and create a pool of flammable liquid wax, sustaining the flames and helping ignite the surrounding materials. If needed, add more firewood or kindling to maintain and enhance the flames. The melted crayon wax acts as a fuel source that continues to burn even after the initial ignition. Additionally, clean up any leftover wax residue after the fire has burned out to minimize environmental impact.
A natural tinder bundle

Creating a well-prepared tinder bundle is crucial for starting a fire efficiently in outdoor settings. Luckily, even if you've got no materials at hand, nature can come to your rescue. All you really need to assemble a tinder bundle, according to TorbyGJordet are some fine, dry materials like birch bark, dried grass, and small twigs.
Ensure that all your materials are dry, as moisture can hinder the ignition process. Peel thin layers of birch bark from a birch tree. Birch bark is highly flammable and makes an excellent fire starter. Then, gather a handful of dried grass or hay. Crumple the grass slightly to create a loose, fluffy texture. Collect small twigs or dry leaves. These materials will be used to build up the flames once the initial ignition occurs.
Lay out a small portion of the birch bark on a flat surface. Form it into a nest or bowl-like shape to contain the other materials. Place the crumpled dried grass in the center of the birch bark nest. Insert small twigs or dry leaves into the center of the dried grass. Carefully fold the birch bark around the dried grass and small twigs, creating a compact and well-contained tinder bundle. Ensure that the materials are layered in a way that allows for easy ignition. The goal is to have a bundle that can be easily transferred to the fire pit or designated fire area. Use a lighter or matches to ignite the tinder bundle — and voila!
Aluminum cans and chocolate

Creating a fire starter using an aluminum can and chocolate involves utilizing the aluminum's reflective properties to focus sunlight onto a flammable material, such as a piece of chocolate. This method is known as solar fire starting and can be a handy survival technique (via David West).
Start by polishing the bottom of the aluminum can to make it as reflective as possible. You can use a cloth, sandpaper, or even toothpaste to achieve a shiny surface. Break the chocolate bar into smaller pieces. Dark chocolate is preferred for this method because it has a higher fat content, making it more flammable. Set up your fire pit or designated fire area with firewood or kindling. Lay a piece of chocolate on the polished bottom of the aluminum can. The concave shape of the can will act as a makeshift parabolic mirror, concentrating sunlight onto the chocolate. Adjust the angle of the aluminum can to focus sunlight onto the chocolate. This may take some experimentation, so be patient and find the best angle to concentrate the sunlight. As the sunlight is focused on the chocolate, it will begin to melt. The melted chocolate serves as a fuel source, and once it ignites, it can start the fire.
It's important to note that this method depends on sunlight, so it works best on sunny days. Additionally, it might take some practice to find the right angle and conditions for successful ignition.
Hand sanitizer fireballs

Hand sanitizer is camping hygiene essential, but did you know it can also double up as a fire starter? Hand sanitizer typically contains a high concentration of alcohol, which is highly flammable.
In order to use hand sanitizer to start a campfire, Survival Tek recommends starting with materials to be used as tinder. Then, place a small amount of hand sanitizer onto your dry tinder. Ensure that the tinder is well-coated but not excessively soaked. Shape the tinder and hand sanitizer mixture into a small ball or mound. This concentrated form will help create a more pronounced fireball when ignited. Use a lighter or matches to ignite the hand sanitizer-soaked tinder. The alcohol in the hand sanitizer will quickly catch fire, creating a fireball effect. As the hand sanitizer-soaked tinder creates a burst of flames, quickly add more kindling and small twigs to build up the fire. Gradually introduce larger pieces of firewood as the flames grow.
Tampon fire starter

No one ever really wants to be on their period while camping, but if the dates align (or misalign), perhaps that box of tampons can be double handy. Tampons are typically made of cotton, which is highly flammable and makes for an effective tinder — which Two Blondes Walking states is perfect for emergency situations where you need to quickly ignite a fire.
To start, choose a safe and well-ventilated area for your fire. Clear away any dry leaves or debris to reduce the risk of accidental fires spreading. Collect dry tinder or other kindling materials. Remove the tampon from its packaging and carefully unwrap it. Push the cotton tampon out of the applicator. Ensure that you expose the cotton fibers inside. Gently pull apart the cotton fibers in the tampon to create a fluffy and airy texture. This increases the surface area and promotes better ignition. Place the fluffed-up tampon in the center of your dry tinder. Arrange the tinder in a way that allows the tampon to catch onto it easily. Then, ignite the tampon. The cotton fibers will catch fire quickly, providing a hot flame to ignite the surrounding tinder.
Pine cones
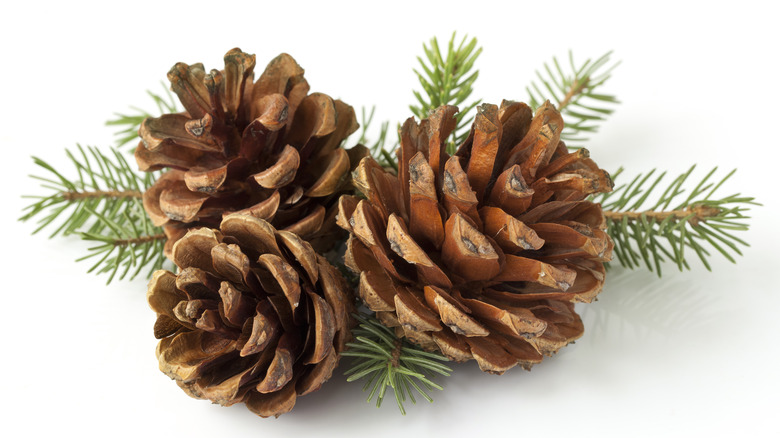
Martha Stewart seems to have been able to turn anything into a craft, even a pine cone into a fire starter. Here's what she recommends. Gather some pine cones. Ensure they are clean and dry. You can wash and air-dry them if needed. Next, get some beeswax. Alternatively, use paraffin wax or candles. Place the wax in a double boiler or a heatproof container set in a saucepan filled with water. Heat the wax on low heat until it melts completely.
Cut a piece of string or twine and tie it securely around each pine cone, leaving enough length to hang the pine cone while dipping it in wax. This will serve as a handle. Holding the string, dip each pine cone into the melted wax, ensuring that the cone is fully submerged. Allow any excess wax to drip off. Hang the wax-dipped pine cones, allowing them to harden completely.
For a thicker wax coating, you can repeat the dipping process once the first layer has hardened. This step is optional and depends on your preference. Once the wax has completely hardened, store the fire starter cones in a cool, dry place until you're ready to use them. When you're ready to start a fire, place one or more wax-dipped pine cones in the center of your fire pit or designated fire area. Ignite the pine cone, and the wax will help it burn longer, providing a steady flame and a rustic and decorative element to your camping or fireplace experience.
Fire-starting bracelet

Creating a fire-starting bracelet with 550 paracord is a practical and ingenious way to carry both a useful survival tool and fire-starting materials with you at all times, as WAZOO reveals, since the inner strands of 550 paracord are often flammable.
Determine the desired length for your bracelet, typically based on your wrist size. You'll want enough paracord to be functional but not too much that it becomes unwieldy. Cut the paracord to your chosen length. Most 550 paracords have seven inner strands. Unravel the outer sheath of the paracord, exposing the inner strands. Cut and remove the excess inner strands, leaving one or two intact for the tinder. Use the remaining inner strands to create the core of the bracelet. You can use a simple braid or a more intricate knotting technique based on your preference.
Attach a buckle or clasp to both ends of the paracord to secure the bracelet around your wrist. Ensure the buckle is secure and won't come undone easily. Take one or two of the remaining inner strands and separate them from the bracelet. Unravel these strands to expose the fine fibers within. Fluff them up slightly to increase their surface area, making them more effective as tinder. Use a lighter or matches to ignite the unraveled inner strands. The fine fibers will catch fire easily, providing a small flame. If you use the tinder strand, you can unravel more inner strands from your bracelet to replenish your fire-starting supply. This makes the bracelet a reusable and practical tool for outdoor adventures
Magnesium fire starter
If you're carrying a magnesium block and ferrocerium rod on your camping trip, this nifty hack from Repkord will show you how to transform them into a fire starter.
Choose a safe and well-ventilated area for your fire. Clear away any dry leaves or debris to reduce the risk of accidental fires spreading. Collect dry tinder, such as cotton balls, birch bark, small twigs, or dried grass. Hold the magnesium block securely, ensuring that your fingers are away from the area where you'll be shaving off magnesium. The block often has a flat side that makes it easier to shave. Use a knife or the edge of another metal object to shave off a small pile of magnesium shavings onto your dry tinder. The magnesium shavings are highly flammable and will catch fire easily. Arrange your dry tinder in a way that makes it easy for the magnesium shavings to catch fire. Fluff up the tinder to increase its surface area.
Hold the ferrocerium rod firmly in one hand. The rod is typically attached to the magnesium block. Ensure that the sparks produced will land on the magnesium shavings and tinder. Using a striker or the back of a knife, strike the ferrocerium rod sharply, aiming the sparks at the magnesium shavings and tinder. The sparks will ignite the magnesium, creating a hot flame. Once the magnesium has ignited the tinder, carefully add more kindling and small twigs to build up the fire. Gradually introduce larger pieces of firewood as the flames grow.
Batteries and steel wool
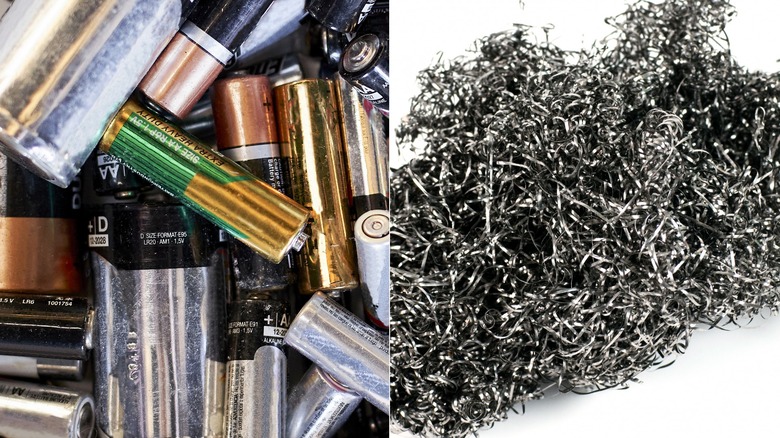
Using batteries and steel wool to start a fire is a classic and effective fire-starting method. According to Instructables, it relies on the steel wool's electrical resistance to generate heat and sparks.
Take a piece of fine-grade steel wool and gently unravel it, creating a loose and airy bundle. This increases its surface area and promotes better ignition. Collect kindling materials to build up the fire once it's ignited. Hold the battery (a 9V battery works well for this method) in one hand and the steel wool in the other. Ensure that the terminals of the battery are easily accessible. Press the steel wool against the terminals of the battery, creating a circuit. The electrical current passing through the steel wool generates heat, causing the steel wool to glow and produce sparks. As soon as the steel wool starts glowing and sparks are produced, carefully transfer it onto your dry tinder. Position the steel wool in a way that allows the sparks to catch onto the tinder easily.
Once the sparks ignite the tinder, quickly add more kindling and small twigs to build up the fire. Gradually introduce larger pieces of firewood as the flames grow. Keep a close eye on the fire as it develops. Add more fuel as needed to maintain a steady and sustained flame. Be cautious when handling the steel wool and ensure it is disposed of properly after use.