The Ultimate Beginners Guide To Reading A Map
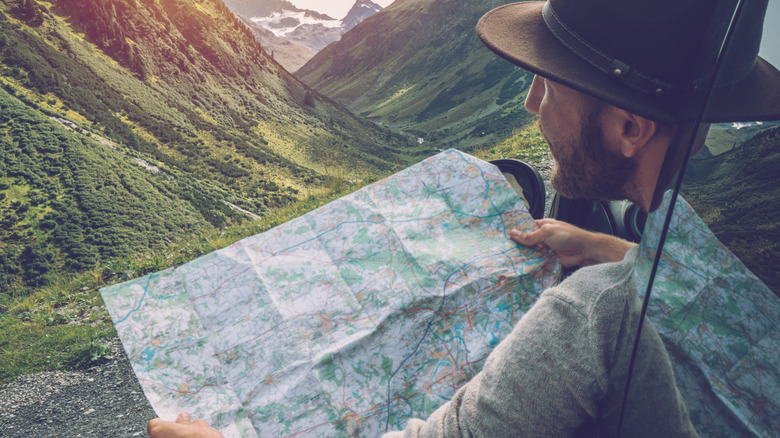
Reading a map should be required learning for every person on this earth. It doesn't matter if you are an avid backpacker, or an average commuter. Having the ability to read a map is not only liberating in terms of knowledge and reduces your reliance on technology, but could save your life in certain situations. So, while it may seem like a daunting task, understanding what maps are and how to use them is the key to successful navigation.
Here's the thing about maps. They are often more accurate (and more reliable) than a GPS device. Whether it's a separate, battery powered device, or the GPS on your phone, sooner or later, batteries will die and signal will be lost, leaving you without a paddle. Having a map as your primary navigation device, not as a backup, will save you several headaches, and help keep you alive, especially if you get lost in the woods.
We're here to give beginners a step-by-step guide as to how to choose and read a map for your given situation. We'll go over map varieties, how to use the legend, understanding grid references and scale, and just what the heck all those squiggly lines mean. Keep in mind, these are just basics you need to get started on your longer journey to becoming a great map reader.
Choose the right map
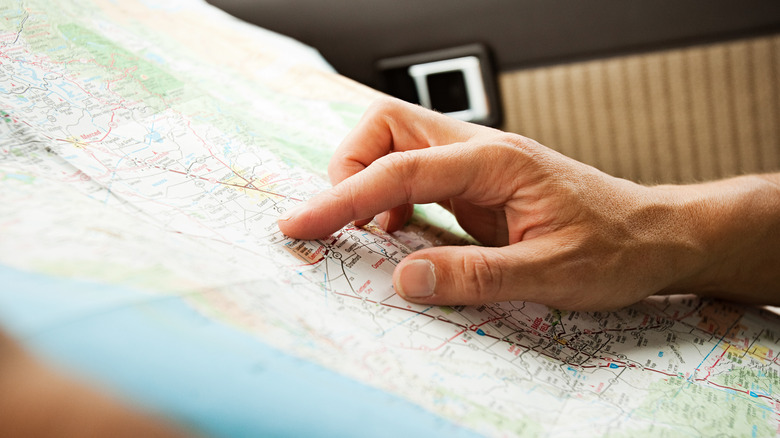
Everything begins with choosing the right map for your traveling situation. There are several different types of maps, but the ones beginners are most likely to encounter are road, topographic, and tourist maps. Let's face it, the vast majority of people use maps to find their way from one house to another. This is where the road map comes into play. Looking exactly as they sound, road maps give you detailed views of all the roads in a specific area in varying degrees of scale and scope. They are the perfect tool for road trip navigation, though you are definitely going to need a navigator riding shotgun to read it.
Next is the topographical map, which is best for those who are going hiking off the beaten path. These maps give incredibly detailed information about the landscape, including changes in elevation, roads, rivers, swamps, and distances between points. These are the trickiest maps for beginners to read thanks to all the squiggly elevations lines on the page, but we'll be getting into how to read those a little later.
Then, there is the tourist map. These are the small, highly detailed maps of well-known tourist locations, such as cities like New York, London, or Paris. The map gives you information on streets, attractions, hotels, and restaurants in the given location. You can buy tourist maps online, but they are also usually available at local shops, chambers of commerce, hotels, and hostels.
Understand the legend
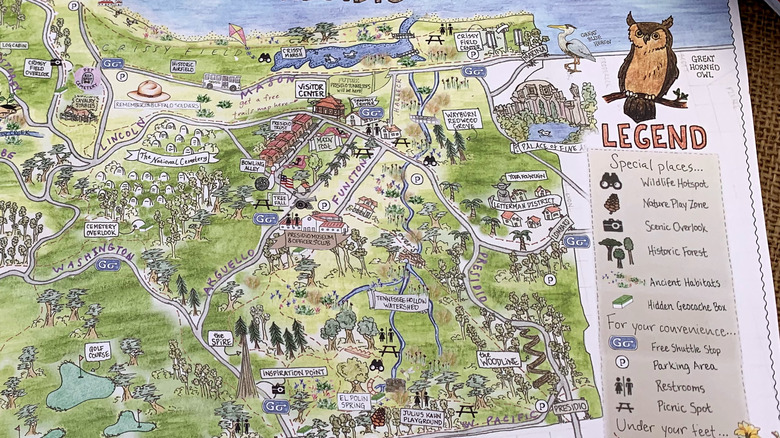
Once you've chosen the perfect map for your situation, you will need to observe the legend. Also known as the key, these are usually represented by a small box on a side of the map that includes a series of symbols. These symbols are used to reference certain elements on the map. Map makers have used symbology to represent aspects of their maps for centuries. Today, most of what you'll find are indications for roads — represented by a solid line, borders — represented by dashed lines, and demarcations for certain important buildings, like post offices or schools.
Note, however, that maps made of, and in, the United States will use different symbology than maps made in Europe or Asia. Symbols that mean one thing in the U.S. will mean something completely different elsewhere. This is why reading the legend of your map before you start any serious navigating is so important. It will give you a lot of the important information you need before you begin your journey.
Here are some of the other symbols you will find on legends: demarcations for campsites, usually in the form of a tent or caravan, a picnic table for an eating area, two crossed pickaxes marking a quarry, wetland grasses for swamps, and a solid red line for a primary highway. These are regulated and created by the U.S. Geological Survey from the Department of the Interior.
Title and Grid References
The title of a map is straightforward, but important. It tends to be located along the upper border of the map, and provides the reader with a clear description of the area that has been mapped. For example, a tourist map could be titled "Historic City Center of Florence, Italy," or a topographic map could be titled something like "Baxter State Park." More important than the title, however, is understanding the map's grid, because this is actually going to help you figure out where you are.
All maps in the United States use an alphanumeric system based on the National Grid. A grid reference is broken up into multiple digits. The more digits a reference has, the greater the accuracy of location. For example, a 10-digit grid reference will locate you to within the precision point of a 1-meter box. Though grid references can be a little tricky to read at first, following this basic rule will help.
Always read to the right and then upwards when using a map. If a location reference reads something like 2410, read right to grid line 24, then up to grid line 10. This is grid referencing at its most basic, allowing you to locate yourself within an area roughly the size of a small neighborhood. Knowing this will get you started in the (sometimes) lengthy process of locating yourself on a map.
A matter of scale
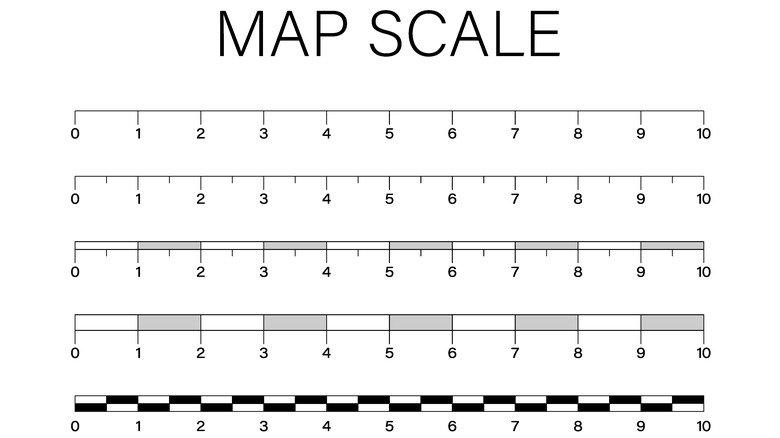
Maps have to be drawn to using a method of scale, otherwise they would be enormous. Imagine a life sized map of Mt. Washington in New Hampshire. In New England parlance, that'd be a "wicked big" map. Because of this fact, cartographers have long used scale to help distill maps into a reasonable size. The scale is defined as a series of numbers which ratio the size of the map to the actual size of the area being mapped.
Here's an example: a common topographic scale reads 1:24,000, which means that every inch on the map corresponds to 24,000 inches on the ground. You can then convert this into inches to feet and feet to miles, or meters, etc. if you're using the metric system. So, inches to feet would be 24,000 inches divided by 12 inches, or 1 foot. You get 2,000 feet out of that, so every inch on the map is equivalent to 2,000 feet on the ground. Do you get the general idea?
The scale ratio depends upon the size of the map itself and how much area is being covered. For example, a 1:1,000,000 scale map would be for something like a country, where the 1:24,000 would be for a regional area, and a 1:10,000 would be for a very detailed, close up map of, say, a specific mountain. Of course, you will have to do math in order to get proper coordinates out of a scaled map.
Orientation
North has been placed at the top of the map page since the Europeans standardized mapmaking in the 16th century. This was owing to the maritime navigational use of the North Star and magnetic compasses. Therefore, the vast majority of maps that you purchase are going to use North as their main orienting direction. This is what is known as Grid North, which utilizes the same U.S. National Grid system we mentioned earlier to help you orientate yourself. Other maps may also use True North, which is located using lines of latitude and longitude, and Magnetic North, which is located using earthbound magnetic pulls.
This is the beginning of orientation, because having a map is pretty useless unless it can help you figure out where you are and what direction you should be going in. By keeping your map upright, i.e always keeping North at the top of the page, you will have a better sense of what direction you're headed because you can base all other directions off of the northern heading.
Remember, the four basic directions are North, South, East, and West, which some maps will mark in the form of a compass rose. You can also use the grid references to pinpoint your location, then use the directional indicator on the map to help you move forward. But, for true accuracy in orientation and direction, you will need a proper compass.
Using a compass
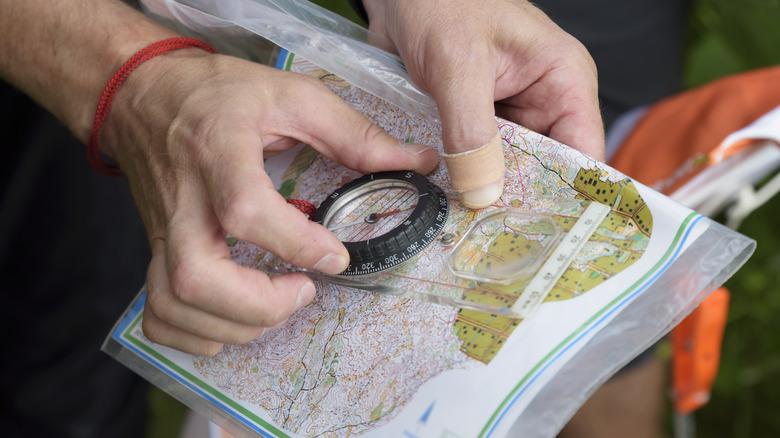
Using a compass and reading a map go hand in hand with each other. And while teaching you how to use a compass could be a whole article in itself, we're just going to go over the basics of compass navigation and how it can help you better understand what is going on with your map. We'll begin by explaining how a compass is constructed and how it works.
A red and white magnetic needle floats within a compass housing, with the red end pointing directly towards magnetic north. Another stationary red needle outside of the housing points to the grid north, allowing you to do mathematical conversions between the two. Map compasses also contain orientation lines, which line up with the horizontal grid lines, or eastings, on your map. It sounds confusing on paper, but putting it into practice will help you better orient yourself to the map.
Basically, you want the grid and magnetic north needles to meet up. Once you've gotten a general idea of where you are on the map, either by grid reference and any immediately noticeable landmarks, take the compass with the stationary needle line pointed to grid north, and make sure that the orientation index on the compass lines up with the grid on the map. Then, turn yourself until the magnetic north needle and stationary needle line up. That represents your direction to travel, and you're good to go!
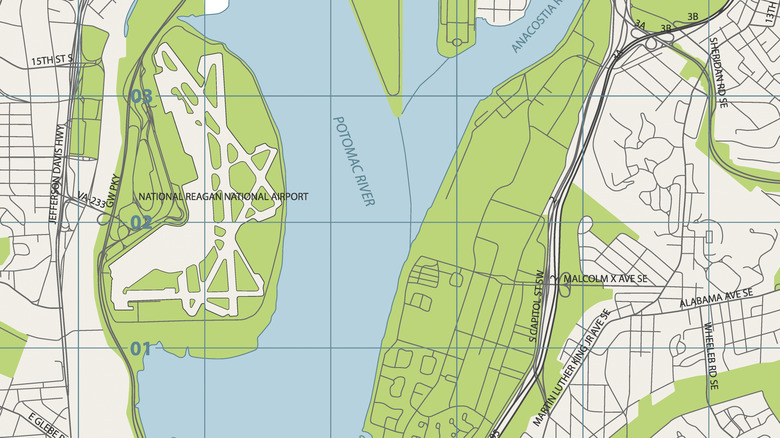
Color schemes
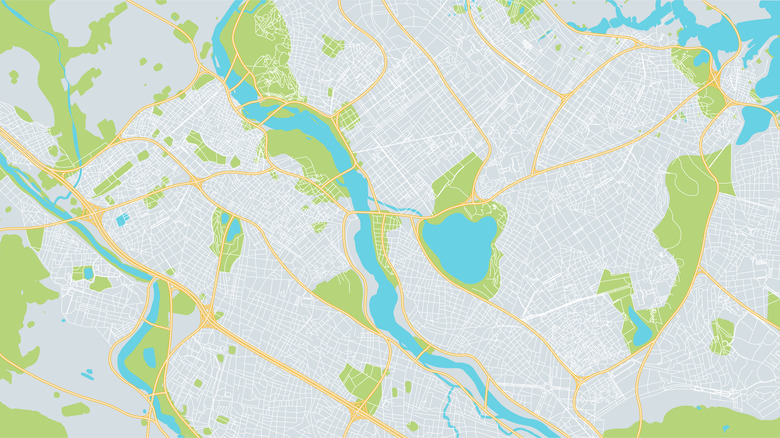
Maps would be very difficult to read if they did not have a generic color scheme to identify certain features. In map making, there are five major colors: blue, black, white, green, yellow, and brown. Each has a corresponding feature, which is either man made or natural to the earth.
Blue should not be all that surprising, as it indicates bodies of water like oceans, ponds, streams, and lakes. Black typically represents man-made features like roads and trails, or rock formations like mountains and boulders. White corresponds to open woods, while green indicates very thick, almost impassable vegetation. Yellow means open, unobstructed land like fields. Brown indicates land features like embankments or contours.
The colors are also intended to give the map extra definition, thereby making it easier to read. Obviously, these are not the only colors you will find on a map. Red or orange lines usually indicate major roadways, while open spaces can be gray. Your legend will serve as your reference guide to the specific colors used by the symbology on the map. However, the five major colors are used in nearly all topographical and orienteering maps, which is why you should know them.
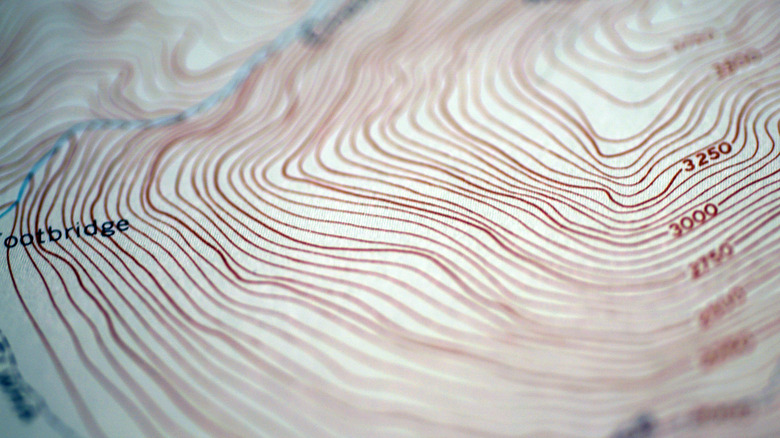
Contour lines
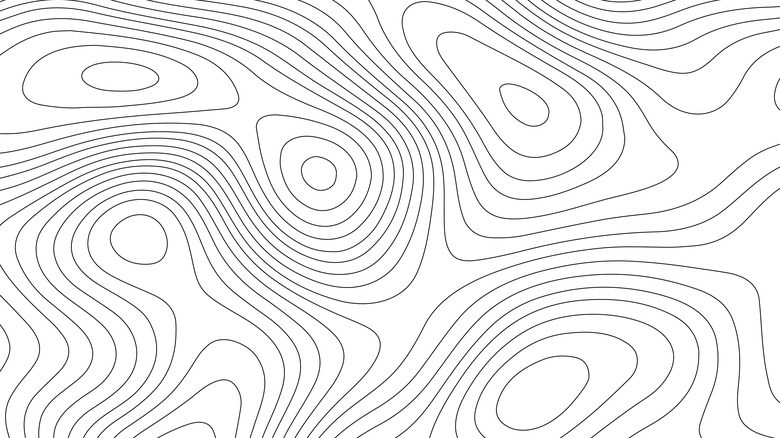
Contour lines, also known as gradients, are those thin, solid black lines that encompass an entire topographical map. Remember, topographical maps analyze, in detail, the landscape of an area. The contour lines are the language with which topographical cartographers communicate changes in said landscape. Fortunately, it is not a difficult language to learn.
Contour lines mainly indicate changes in elevation and depression. They share space with contour intervals, which note the vertical distance between lines, and appear as thickly bolded lines that appear every fifth contour line. If the map comes with numbers, those trending upwards mean elevation, and those trending downwards mean depression. Depending on the scale of your map, the distance between contour lines is typically between 10 to 20 feet.
Contour lines will also give you an indication of slope. If they are spread widely apart, that's a gentle slope. A steep slope will be marked with the lines being closer and closer together. In a depression, there will sometimes be small tick marks along the contour lines pointing downwards to give you a visual indication of what the depression is. Their usefulness really comes into play when you are trying to navigate an area where the topography is not exactly clear from ground level. Many hikers have gotten injured or have died for failing to properly understand the landscape around them.
Landscape features
We've talked already about how contour lines indicate steep and gentle slopes, but now we'll get into how they show valleys, peaks, ridges, spurs, and saddles. All of these are important to know, as they can help you decipher how difficult the terrain you're heading towards might be.
Ridges, being a long, skinny part of a mountain range, are indicated topographically by a U or V shape depending on how gentle or sharp the ridge is. The tip of the letters are pointed towards higher elevation. The saddle, which is the lowest point between two high points, appears as an hourglass or horse saddle shape, hence the name. A spur is the part of the ridge that slopes towards lower elevation. These are indicated by the same U and V pattern, only the tips are pointing towards lower elevation.
The peak being the highest point of a mountain or hill is indicated by a circle, and the summit might be marked by an X. Valleys, which are depressions that run between elevations, are indicated, again, by that same U and V pattern, only they are spaced really tightly together, and the opening of the letter is pointed towards the lower elevation. Knowing these shapes and how they appear on a map is really going to help you better read a topography, and thereby have a better understanding of your surroundings.
How to find where you are

So, now that you have a decent idea of what's happening on your map, we're going to put some of these lessons into practice by explaining to you exactly how to find yourself. On a map, that is. Firstly, you need to observe and identify your surroundings. Look for notable features you might be able to reference on the map. These could be bodies of water, hills, towns, monuments, or other defining features that might be indicated in the legend. For example, a map of Mt. Greylock in Massachusetts will show the Veteran's War Memorial Tower. Places like this are great starting off points for finding yourself.
Once you have a general idea of where you are, it's time to make your grid reference. Remember, read to the right, then up to zero in as best you can on your location. So, if that lake you're near is in grid reference 1206, you go across to box 12, then up 6.
This is a pretty rudimentary way to find yourself on a map. There are more detailed ways to do it, but seeing as this is a guide for beginners, knowing these basics is going to get you out of your fair share of sticky situations. Plus, the more confidence you build in finding yourself, the more apt you'll be to learn more advanced skills.
Thumbing
Thumbing is an easy trick that you should always practice when you are using a map. In essence, thumbing is an excellent way to help you know where you've come from. Knowing this will allow you to easily continue your navigation without the need to backtrack. Plus, thumbing can prevent you from going in circles. And trust us when we say, this trick really is very easy.
Once you've found your location on the map, place your thumb directly on the spot where you are, and leave it there. Hold onto your map with your thumb in place while you walk. This way, when you go to reference the map again, you will know exactly where you just came from. Orient yourself again, mark it with your thumb, and continue onwards. Do this every time you stop to take your bearings.
Thumbing gives you a better starting off point the next time you need to orient yourself and check your direction. This way you won't have to make a grid reference twice to find out where you came from and where you're going. Instead, you'll only have to do the latter.
Practice, practice, practice
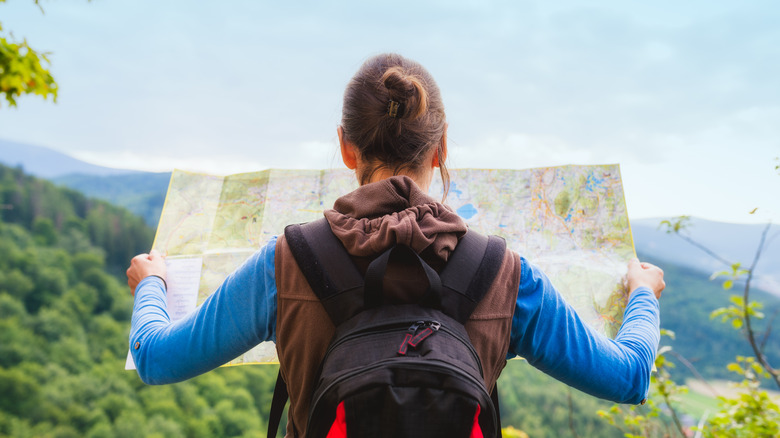
None of this is going to do you any good whatsoever if you don't practice. Reading a map is not something that comes naturally to a lot of people. As you've seen, there are a lot of layers that go into it. So, while knowing the fundamentals is relatively easy, learning how to properly navigate is going to take some practice.
Obviously you will want to do this in a comfortable and safe environment to start. See if you can find a map of your neighborhood or town, and start locating yourself at various locations. Once you're comfortable with that, take it to the next level by finding your way to a new place by using a road map instead of the GPS. You might get lost, but that is all the more reason to practice.
The reason practicing is so important is because you really can't rely on technology to get you where you need to go. They are great tools, of course, but they are not everything. Plus, the empowerment you will gain from an understanding of map and navigations skills is second to none. So, learn to read a map. It'll only serve you well.