DIY A Self-Watering Planter By Upcycling An Empty Alcohol Bottle
We may receive a commission on purchases made from links.
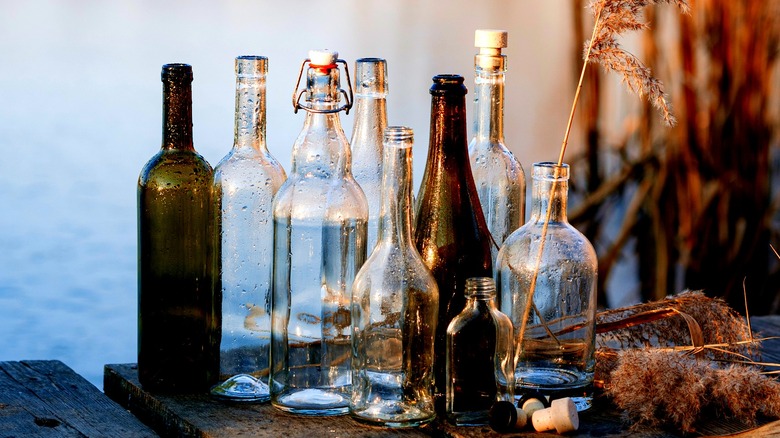
Too little water — or too much — can place a great deal of strain on both indoor and outdoor plants. This imbalance can be fatal, especially for young or sensitive plants. A self-watering planter reduces the likelihood of these problems by regulating the moisture in a plant's growing environment. It's a handy tool for beginning gardeners and people who travel often but don't want to hire a house sitter. Most affordable models are plastic, but you can create a sturdier version for little to no cost using a glass alcohol bottle, glass-cutting tools, and a rope such as the Garhelper Cotton Wick Cord. Unlike many other self-watering planters, this DIY version relies on the rope's absorbent power to deliver moisture to thirsty plants.
A bottle and rope are the building blocks of this project, but tools for cutting glass are absolutely essential. Don't have these supplies at hand? Consider investing in them, especially if you're interested in other garden DIYs, such as transforming a wine bottle into a bird feeder. To slice an alcohol bottle in half, you'll need a glass cutter with a wheel made of tungsten carbide or hardened steel. You'll also need a ruler, running pliers, sandpaper, and cutting oil to minimize friction when cutting. Don't forget to gather safety gear, too. Make sure to protect your eyes with goggles and your hands with gloves. Finally, you'll need sharp scissors and a clean workspace for creating your self-watering planter.
How to turn a bottle into a self-watering plant pot
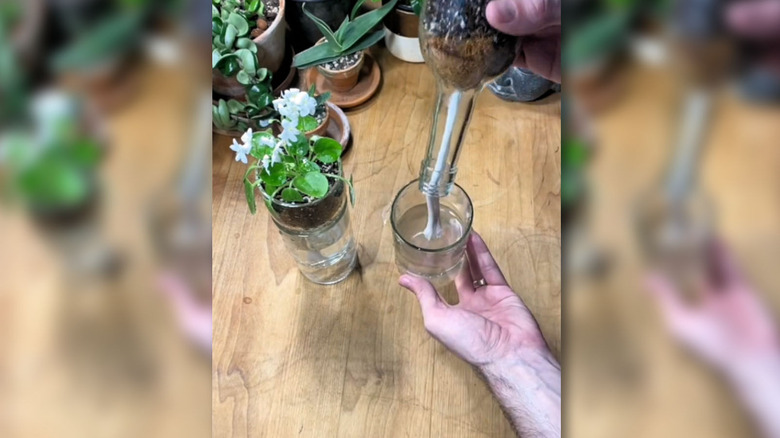
To begin, oil your glass cutter, score the bottle, and slice it in half horizontally. Then, use sandpaper to smooth any jagged edges. Place the upper half of the bottle in the lower half, making the tapered portion face the ground. Cut a piece of wicking cord, fold it at its midpoint, and knot it to an inch or two below the bend to form a loop. Make sure the knot is large enough that it won't slip through the bottle's opening. Place the knotted portion in the bottle's neck and allow the loose ends to hang through the opening until they reach the base.
@plantdaddypodcast This is how I set up a plant in my upcycled self-watering wine bottle planters. These plants need minimal care to thrive, thanks to capillary action – perfect for a forgetful plant parent like me! #winebottlescraft #diyproject #houseplantdiy #upcycling #selfwatering #glasscraft #tiktokdiy #learnontiktok #plantprojects #planthacks #planttoktips #planttiktok #houseplanthacks #africanviolet
Next, add potting soil and plants to the top half, completely covering the cord loop. When your plants are snug, fill the planter's base with water and make sure that the loose ends of the cord are submerged. Water will wick through the cord and keep your plants hydrated. Refill the water reservoir as needed to maintain consistent moisture. With this DIY, you can rest easy knowing that you've avoided two major watering mistakes for your plants.
Hesitant to work with glass but want to make your own self-watering planter? Try this project with a plastic bottle instead of glass. A 2-liter soda bottle will work for many full-size houseplants. If you're running low on wick cord, an old cotton clothesline will work in a pinch. Just keep in mind that rope made of cotton or other biodegradable materials will decompose over time. For this reason, some plant growers prefer acrylic yarn or nylon rope for homemade self-watering plant pots.