DIY Your Own Hiking Stick For A Fun And Stunning Project
We may receive a commission on purchases made from links.
When physically preparing for your next hiking trip, having the right gear is essential. A DIY hiking stick is a more decorative, handmade alternative to poles, making them a perfect, customizable item to bring on your next hike. The project keeps your hands busy, helps you slow down, and prepares you for your next outdoor adventure in the outdoors. Though the process is simple, it's engaging and can be completed over a couple of afternoons.
The first thing you will need to do is find a good stick to work with. You can typically find a good stick along a trail or in areas where trail maintenance has recently occurred and branches have been cut. You should find a stick that is more recently removed from a tree, as a fully dead and dry stick won't be as strong. It should be around the same height as you are, although you can trim it later to a better height. Aim for a stick about an inch thick so it fits comfortably in your hand.
Once you have found the best stick for you, you will need to collect a few other materials. You should get a polyurethane wood finish, sandpaper, Gorilla Glue, and a non-slip pad for the bottom. For the chair leg tips, get ones that are either the same size or a little bit smaller than the bottom of your stick – these Scotch Chair Tips from Amazon work great. For tools, you will need a knife, a foam brush, and a saw if you want to adjust the height of your stick or square off the edges.
Peeling, sanding, and finishing your hiking stick

Once you have your stick and materials, start by peeling the bark off. If you have patience, durable fingernails, and soft, moist bark, you can hand peel it. This leaves the wood smooth and scratch-free, though it can be tough on your hands. You can also use a knife, but take care to remove bark evenly and avoid cutting too deeply. This could leave your stick rough and uneven.
Once the bark is peeled, you will want to sand off any sharp or rough spots. Sand the ends until they're even and rounded for a more comfortable grip. If you have any cracks, you can fill them with the Gorilla Glue, clamp the crack closed, and wait for the glue to expand and dry. Once it is dry, cut off the excess and sand it smooth.
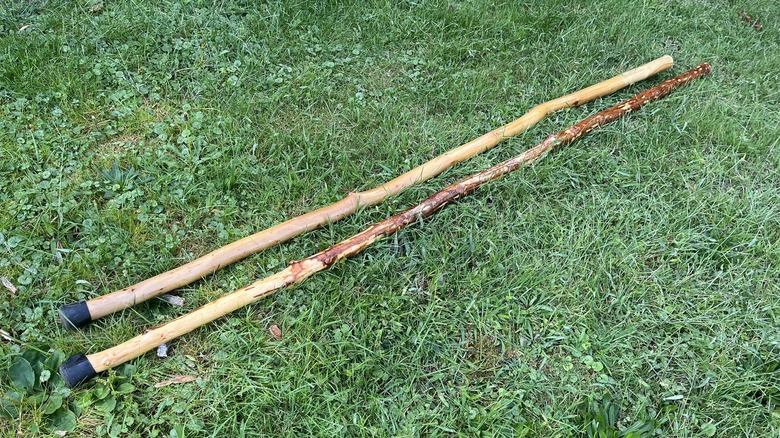
Next, apply the polyurethane to your hiking stick with the foam brush. Apply a thin first coat, let it dry for three to four hours, then sand lightly. Afterward, apply thicker coats and allow more drying time between layers. Apply at least three coats, or more if you want a shinier, smoother finish. Once you are done with the polyurethane, it is time to put on the rubber bottom. Fill the rubber chair tips with a little bit of Gorilla Glue, push them on the end, and let them dry. Once your stick is complete, explore other hiking essentials and plan your gear for your next trip.