A Stylish DIY Wooden Chair That'll Take Your Outdoor Space To The Next Level

We may receive a commission on purchases made from links.
We all know that spending time outside is good for us. Whether you're hiking, camping, or simply relaxing in your backyard, benefits like reduced anxiety and boosted immunity are just the beginning. The truth is, you don't even have to be active—anything is better than being inside on the couch. So, if you're ready for some unique seating ideas to spruce up your outdoor space and make it easier to get outside, this stylish DIY wooden chair can get you there.
One of the great things about this project is that Shara from Woodshop Diaries on YouTube offers plans for matching sofas, loveseats, coffee tables, and side tables. You can mix and match to build a complete set, with the bundle of plans available for $27.99. This DIY project requires careful measurement and experience with power tools, making it better suited for experienced builders. You may also need a few special tools, such as this XL Kreg Pocket-Hole Jig.
Cedar lumber is a good choice for this outdoor furniture project. You'll need two 4-by-4-by-8-inch beams, one 1-by-2-by-8-inch beam, and three 2-by-4-by-8-inch beams. For assembly, you will use both 2½-inch and 4-inch exterior pocket hole timber screws, as well as 2½-inch exterior wood screws, and wood glue. Finally, you will need some exterior wood finish and adjustable foot levelers to keep it from rocking on hard surfaces.
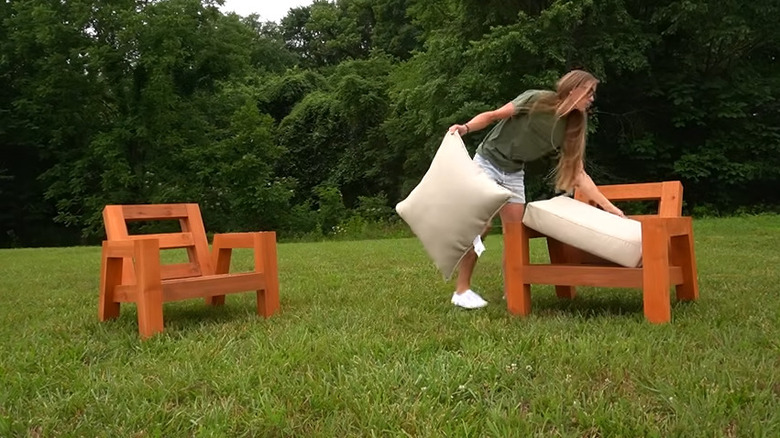
Creating a stylish outdoor space for entertaining and relaxing
To start this project, cut your lumber according to the angles and dimensions specified in the plans you've purchased from Shara.. Then, sand and stain the wood pieces to give them a clean, polished look. The assembly of this wooden chair starts with the two side frames, which will be made using 4-by-4-inch cedar beams. Next, lay the pieces on a flat surface, positioning the legs vertically and the armrests and supports horizontally.
Now, pre-drill pocket holes for the screws using your jig, then apply glue before attaching the pieces together, making sure everything is flush and precise as you go. Then, align the beveled end of the back frame posts and attach them with timber screws. Wipe away excess glue and allow the assembled side pieces to dry before moving on to the back slats and seat supports.
When the sides are dry, it's time to install the back slats. Start by pre-drilling holes in the 1-by-2-inch beams to prevent splitting, then attach them 1½ inches from the edge of the back supports so you can screw the slats into them. Now, measure and cut your 2-by-4-inch lumber pieces into slats (you can cut your seat slats at this time, as well) and screw them into place with exterior wood screws, making sure they're evenly spaced.
Finishing touches to complete your DIY wooden chair
The final step in assembly is to install the seat supports and slats. Use the jig to pocket drill holes for the screws, and install the seat supports about 12 inches from the bottom with both screws and glue. The front support is placed between the two front legs, and the back support is installed against the back posts. Make sure these are flush to the top of the frame before screwing them in place. Then, install the other three seat supports, once again ensuring they're evenly spaced. After that's done, you can attach and seat the feet levelers to make sure your new chair doesn't rock.
The cushion set that this creator recommends comes from the Arden Selections Store and comes in several stylish choices, so it won't be hard to find one that matches your yard's aesthetic and color palette. If you want to use different cushions, start by measuring their width and depth and make changes to the plan to accommodate the measurements.
This DIY outdoor chair will look great on your lawn or around a campfire pit. It's also perfect for a patio or deck. No matter where you put this chair, though, you'll enjoy its rugged charm. You may even end up wanting to make the whole set.