What Is Seed Stratification, And How Can You Implement It In Your Garden?
We may receive a commission on purchases made from links.
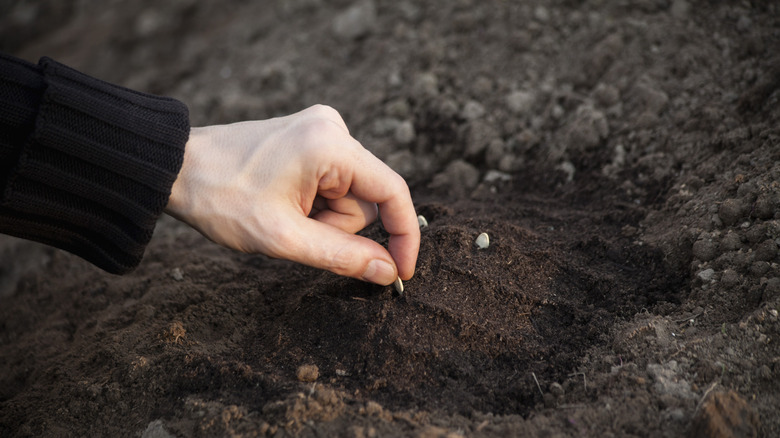
Some seeds will germinate with no help from gardeners — for example, those from the Halloween pumpkin you tossed into your compost pile. Others won't sprout unless they've chilled at a certain temperature for a specific amount of time. Fulfilling these chilling requirements is known as cold stratification. Many seeds undergo stratification naturally, outdoors during the winter. You can also make this process unfold in your refrigerator. When seeds that have taken this wintry nap encounter warm temperatures, they unzip their coats — aka their outer shells — and start to grow.
Lots of seeds need to go through cold stratification, including perennials such as lavender, wildflowers such as lupine, and herbs such as rosemary and oregano. Cherries, plums, and many other fruit trees rely on this process as well. Fridge-based stratification is a handy tool when you forget to sow seeds outdoors in the autumn and want them to sprout the next spring. Plus, when you take seed stratification off of Mother Nature's plate, you control many of the variables. You decide the temperature and moisture level the seeds experience. What's more, you know exactly how long they've been chilling. This makes it easy to determine when stratification is done and start the next step of the germination process.
In theory, the sooner seeds have stratified, the sooner they can grow in your garden. However, your seeds are most likely to succeed if planted at the right depth and the right time. This means waiting until the frost risk has passed, a key detail for determining the best time to plant tomatoes and other veggies, so controlling stratification timing is a plus.
Two ways to stratify your seeds at home
If you've ever grown an apple seedling as a science experiment, you probably remember wrapping a seed in a damp paper towel and placing it in the refrigerator. These steps are the essence of fridge-based seed stratification. In addition to looking up how long your seeds must chill and how cold they need to be, determine their hydration preferences. Some seeds crave moisture during dormancy, while others prefer to stay dry. Seeds that favor dry conditions can chill in a sealed jar. Inserting a packet of Dry & Dry silica gel desiccant or a similar product can help keep moisture out. Seeds that prefer damp conditions can sit in a plastic bag, in the middle of a moistened coffee filter. Add a few drops of water when the filter starts looking dry. Also label your containers with stratification start dates and keep them away from the fridge door, which shields them from temperature changes.
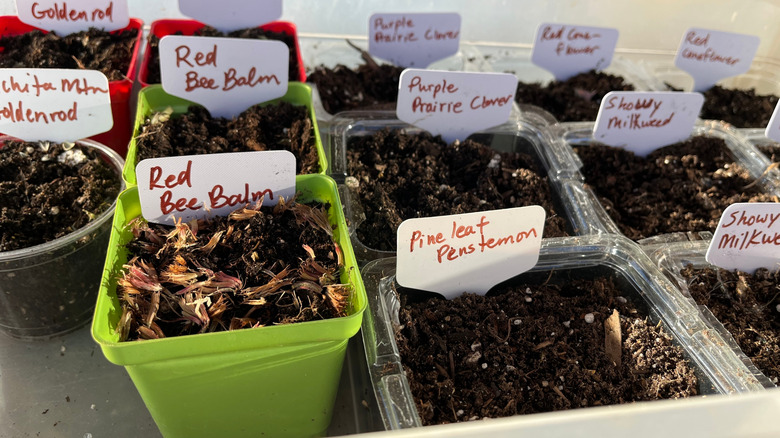
Live in a cool climate? Try winter sowing. This involves planting seeds in greenhouse-like containers and storing them outdoors during winter. Once the seeds have chilled for the required period, the container's warm, moist, and low-wind environment encourages them to germinate. You can create this habitat by planting seeds in small pots, watering them, and then placing the pots in a lidless, clear plastic box with a barrier on top to deter critters. Sowing your seeds into plastic milk jugs will also work. This approach is popular for bee balm (Monarda spp.) and several other native plants that attract hummingbirds to your garden. Once your seedlings have sprouted and hardened off, move them to their forever homes.