Our Best Tips For Getting The Perfect Picture Of The Northern Lights

Witnessing the Northern Lights (aka aurora borealis) is a bucket-list type experience for millions of people around the world. This atmospheric phenomenon is frequently visible in areas ringing the Arctic Circle, drawing hordes of visitors each year. However, during times of particularly intense solar flare activity, such as what occurred recently, the lights become visible over a much larger geographic region, allowing untold millions more to experience their glow. But for many, just seeing the Northern Lights isn't enough — they want to document their experience with photos. After all, in today's cultural climate, if there isn't a photo or a post about it, did it really happen?
Taking photos of the Northern Lights can be tricky. After all, they occur during lowlight periods, and nighttime photography always presents some challenges. However, there are some things you can do to ensure you get frameable (or post-worthy) pics if you are lucky enough to see the aurora. Here are some tips for getting that perfect picture of the Northern Lights.
Adjust phone camera settings for epic shot

Let's be honest, the majority of photos taken of the Northern Lights — or anything else for that matter — will be taken with a smartphone. While it is certainly possible to get good photos of the aurora with a phone camera, there are a few things to do to make sure you capture that epic shot.
The primary thing you need to do with your phone when photographing the Northern Lights is to tweak the settings. First and foremost, turn off the flash. If your phone camera has a night mode, use it. Dim your screen brightness so it doesn't interfere with your viewing experience (or that of others nearby). If your phone has manual focus capabilities, set the focus to infinity and adjust the exposure time to 10 seconds (or longer). Keep in mind, in order to get a crisp photo with such a long exposure, it is absolutely necessary to keep the phone camera still throughout the exposure.
Some specific apps, such as Northern Lights Photo Taker, are available for those who don't want to bother too much with settings manually. If you choose to use a special app for these photos, be sure to download it in advance and experiment with taking photos with it before attempting to photograph the Northern Lights.
Adjust camera settings to capture the perfect image
As popular as smartphone photography has become, there will still be plenty of people setting out to photograph the Northern Lights with an actual camera in hand. As is the case with the phone cameras, settings on DSLR and mirrorless cameras will also need to be fine-tuned in order to get the best photos of the aurora.
The absolute best practice is to use manual settings or some combination of manual and auto settings. For the most part, you should shoot as you would any night scene, meaning you should also use a very wide aperture and slow shutter speed to capture as much light as possible. Conversely, you should set a high ISO to brighten the image. When it comes to focusing, if you are manually focusing, focus on the further point you can see. If you are using an auto-focus setting, set the focus to infinity.
If you are using auto modes, the obvious choice is night mode. Again, many cameras allow you to adjust some of your settings even in auto mode. If so, follow the above advice for many settings for those individual settings you want to adjust on your own. You can also play with landscape mode for shooting the Northern Lights, particularly if you are able to manually set the aperture while in landscape mode on your particular camera model.
Use the right lens to ensure good shots
In addition to tweaking camera settings, making sure the camera is fitted with the right lens can make a huge difference when photographing the Northern Lights. For one, settings on the camera only work if the lenses are able to handle them. Additionally, you need to make sure your field of view is wide enough to capture the scene. Canon suggests using wide lenses with focal lengths between 14mm and 35mm. Fast lenses, with an f-stop of 2.8 or higher are also recommended. These same suggested parameters would apply to any brand of camera body and lenses.
You also want to make sure you use the highest quality glass you can afford. Good lenses can be expensive, but in a situation like this, it can pay off. After all, how often do you really get an opportunity to take photos of the Northern Lights? Investing in good equipment, especially a good lens, can make all the difference for this unique photographic opportunity.
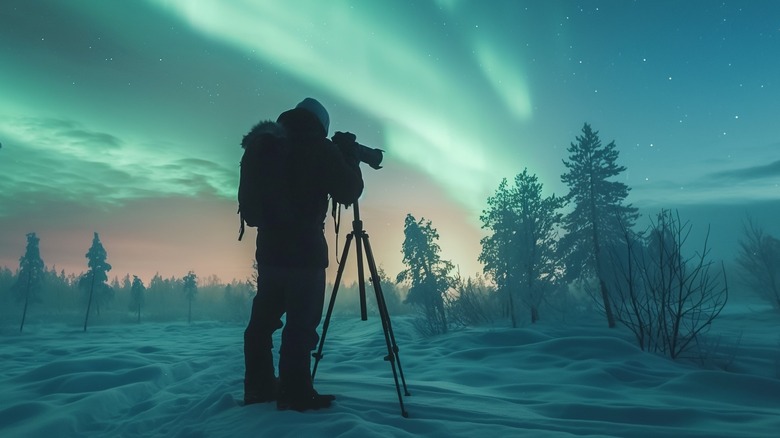
Use a tripod to capture sharp images

Whether you are using a full-body camera or a camera phone, a tripod will greatly enhance your photos of the Northern Lights. Why? Well, simply put, any shake during exposure causes a photo to be less than crisp. The longer the exposure time, the more difficult it is to maintain a steady camera position. Given that the best photos of the aurora are taken with longer exposure times, as is common with nighttime or low-light photos, it can be practically impossible to hand-hold the camera steady enough to prevent blur.
The primary advantage of a tripod is that it gives photographers the ability to capture sharp, crisp images with long exposure times and/or under low-light conditions – each of which applies to photographing the Northern Lights. However, one overlooked advantage to utilizing a tripod for photography is once you line up that perfect frame, you can hold it in place for multiple shots. This can be invaluable when trying to capture the Northern Lights.
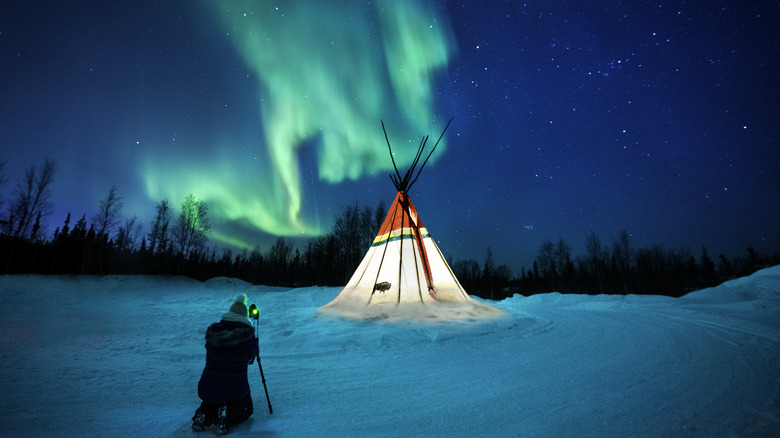
Pick the right spot for a memorable shot
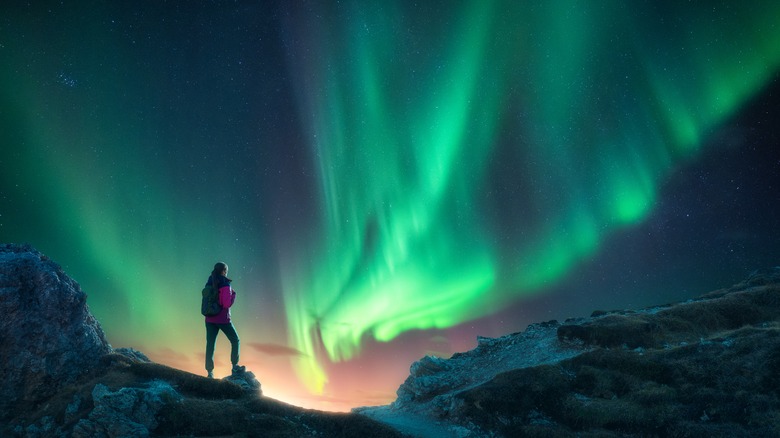
Finally, it really doesn't matter the equipment or settings you use if you aren't in one of the best spots to view the Northern Lights. After all, you can only photograph what you can see, so it is essential to pick the perfect spot so you can get that perfect shot. The best way to do this is to travel to an area with good viewing conditions. Luckily, these also often happen to be some of the most breathtaking places to camp and provide plenty of other photo opportunities in addition to the Northern Lights. But, keep in mind, the same ruggedness that provides so much natural beauty in these areas can also make them very dangerous to hike.
Regardless of whether you are camping or staying in other accommodations, scout your location before evening. Ideally, you want an unobstructed view but with something in the foreground to add to the composition and depth of the photo. It is also important to choose a spot without much light pollution or ambient light from homes, street lights, etc. While this may not always be possible, the less external light you're surrounded by, the more vivid the Northern Lights will appear.